Templates#
The Templates section acts as a repository for standardized resource deployment patterns, which can be utilized to maintain consistency and reliability across tenant environments. Few examples include provisioning specific k8s manifests, Helm charts, Secrets or ConfigMaps across a set of namespaces.
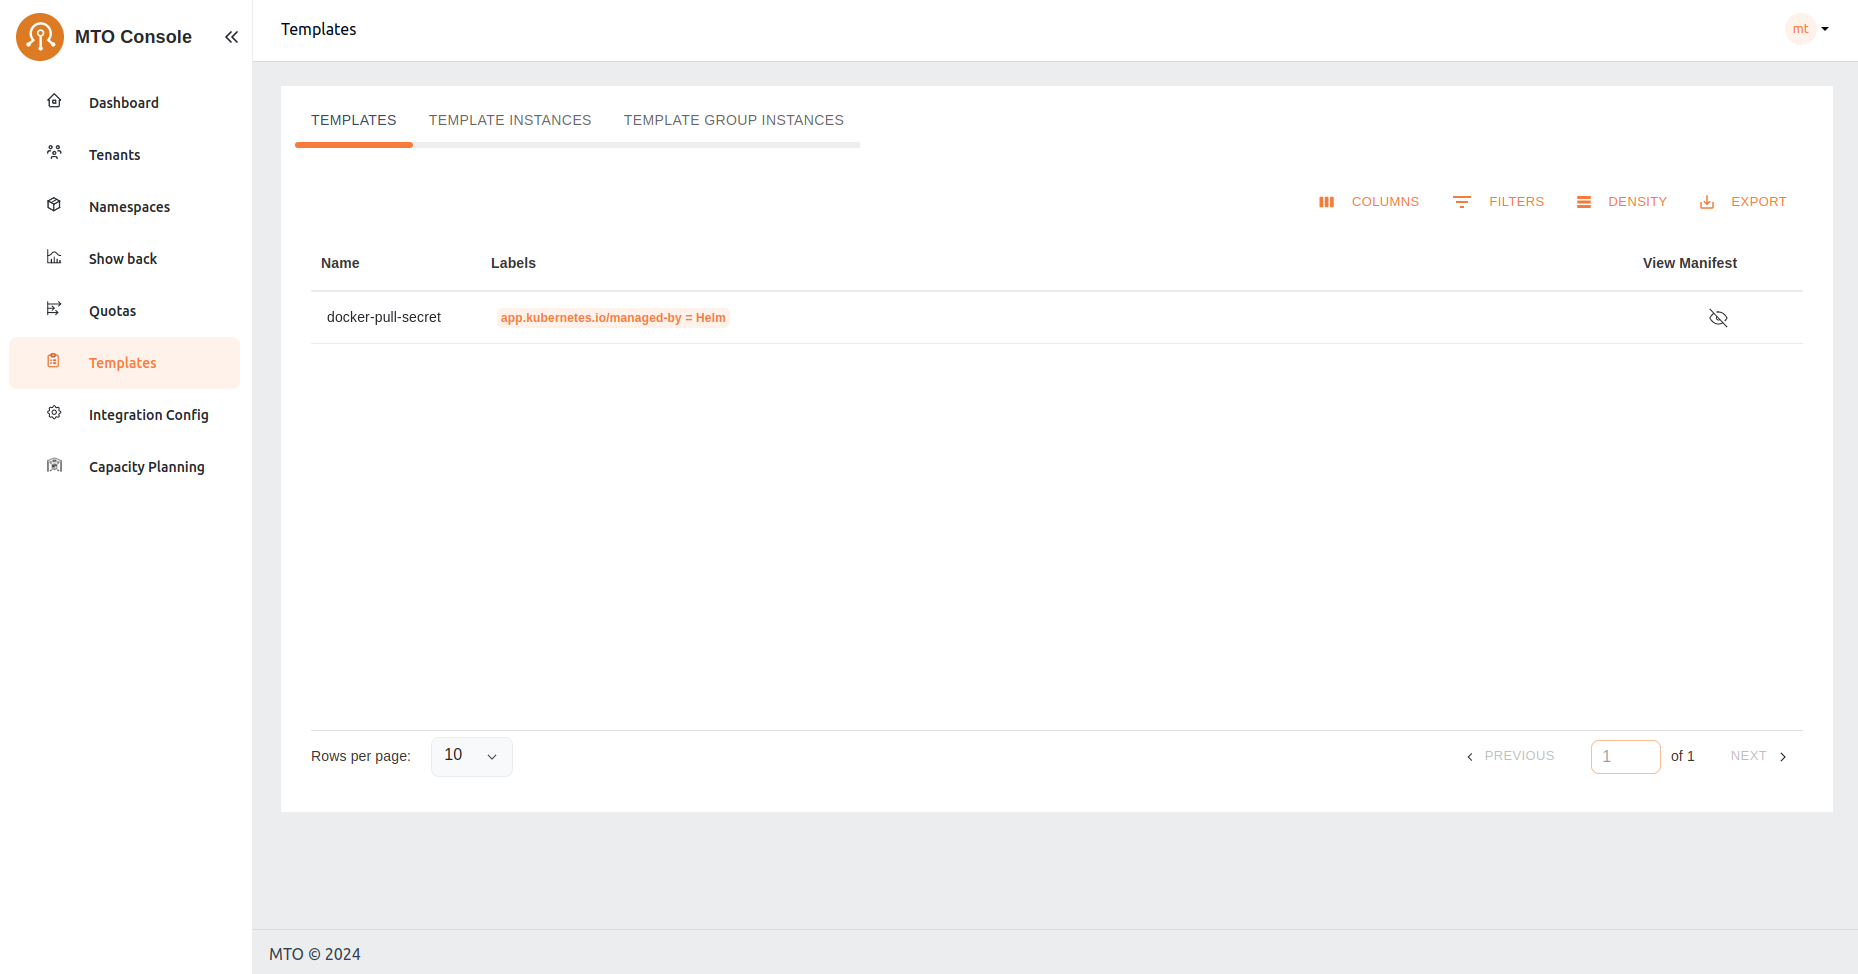
The Templates list page shows each template in a row with Name, Type, Version, Created, and Actions columns. Templates currently in use are marked with an In Use badge next to the name. Clicking on a template's name opens its Template Instances page, which has separate Template Instances and Cluster Template Instances tabs. The Actions kebab menu on each row provides options to view instances, view YAML, edit, or delete the template.
Create Template#
The template creation process in the MTO Console is designed to be intuitive and flexible, allowing users to define reusable deployment patterns for resources such as Kubernetes manifests, Helm charts, Secrets, or ConfigMaps. Click the Create Template button on the top-right of the Templates page to open the creation drawer. The drawer presents a stepper with the following sections:
Template Overview#
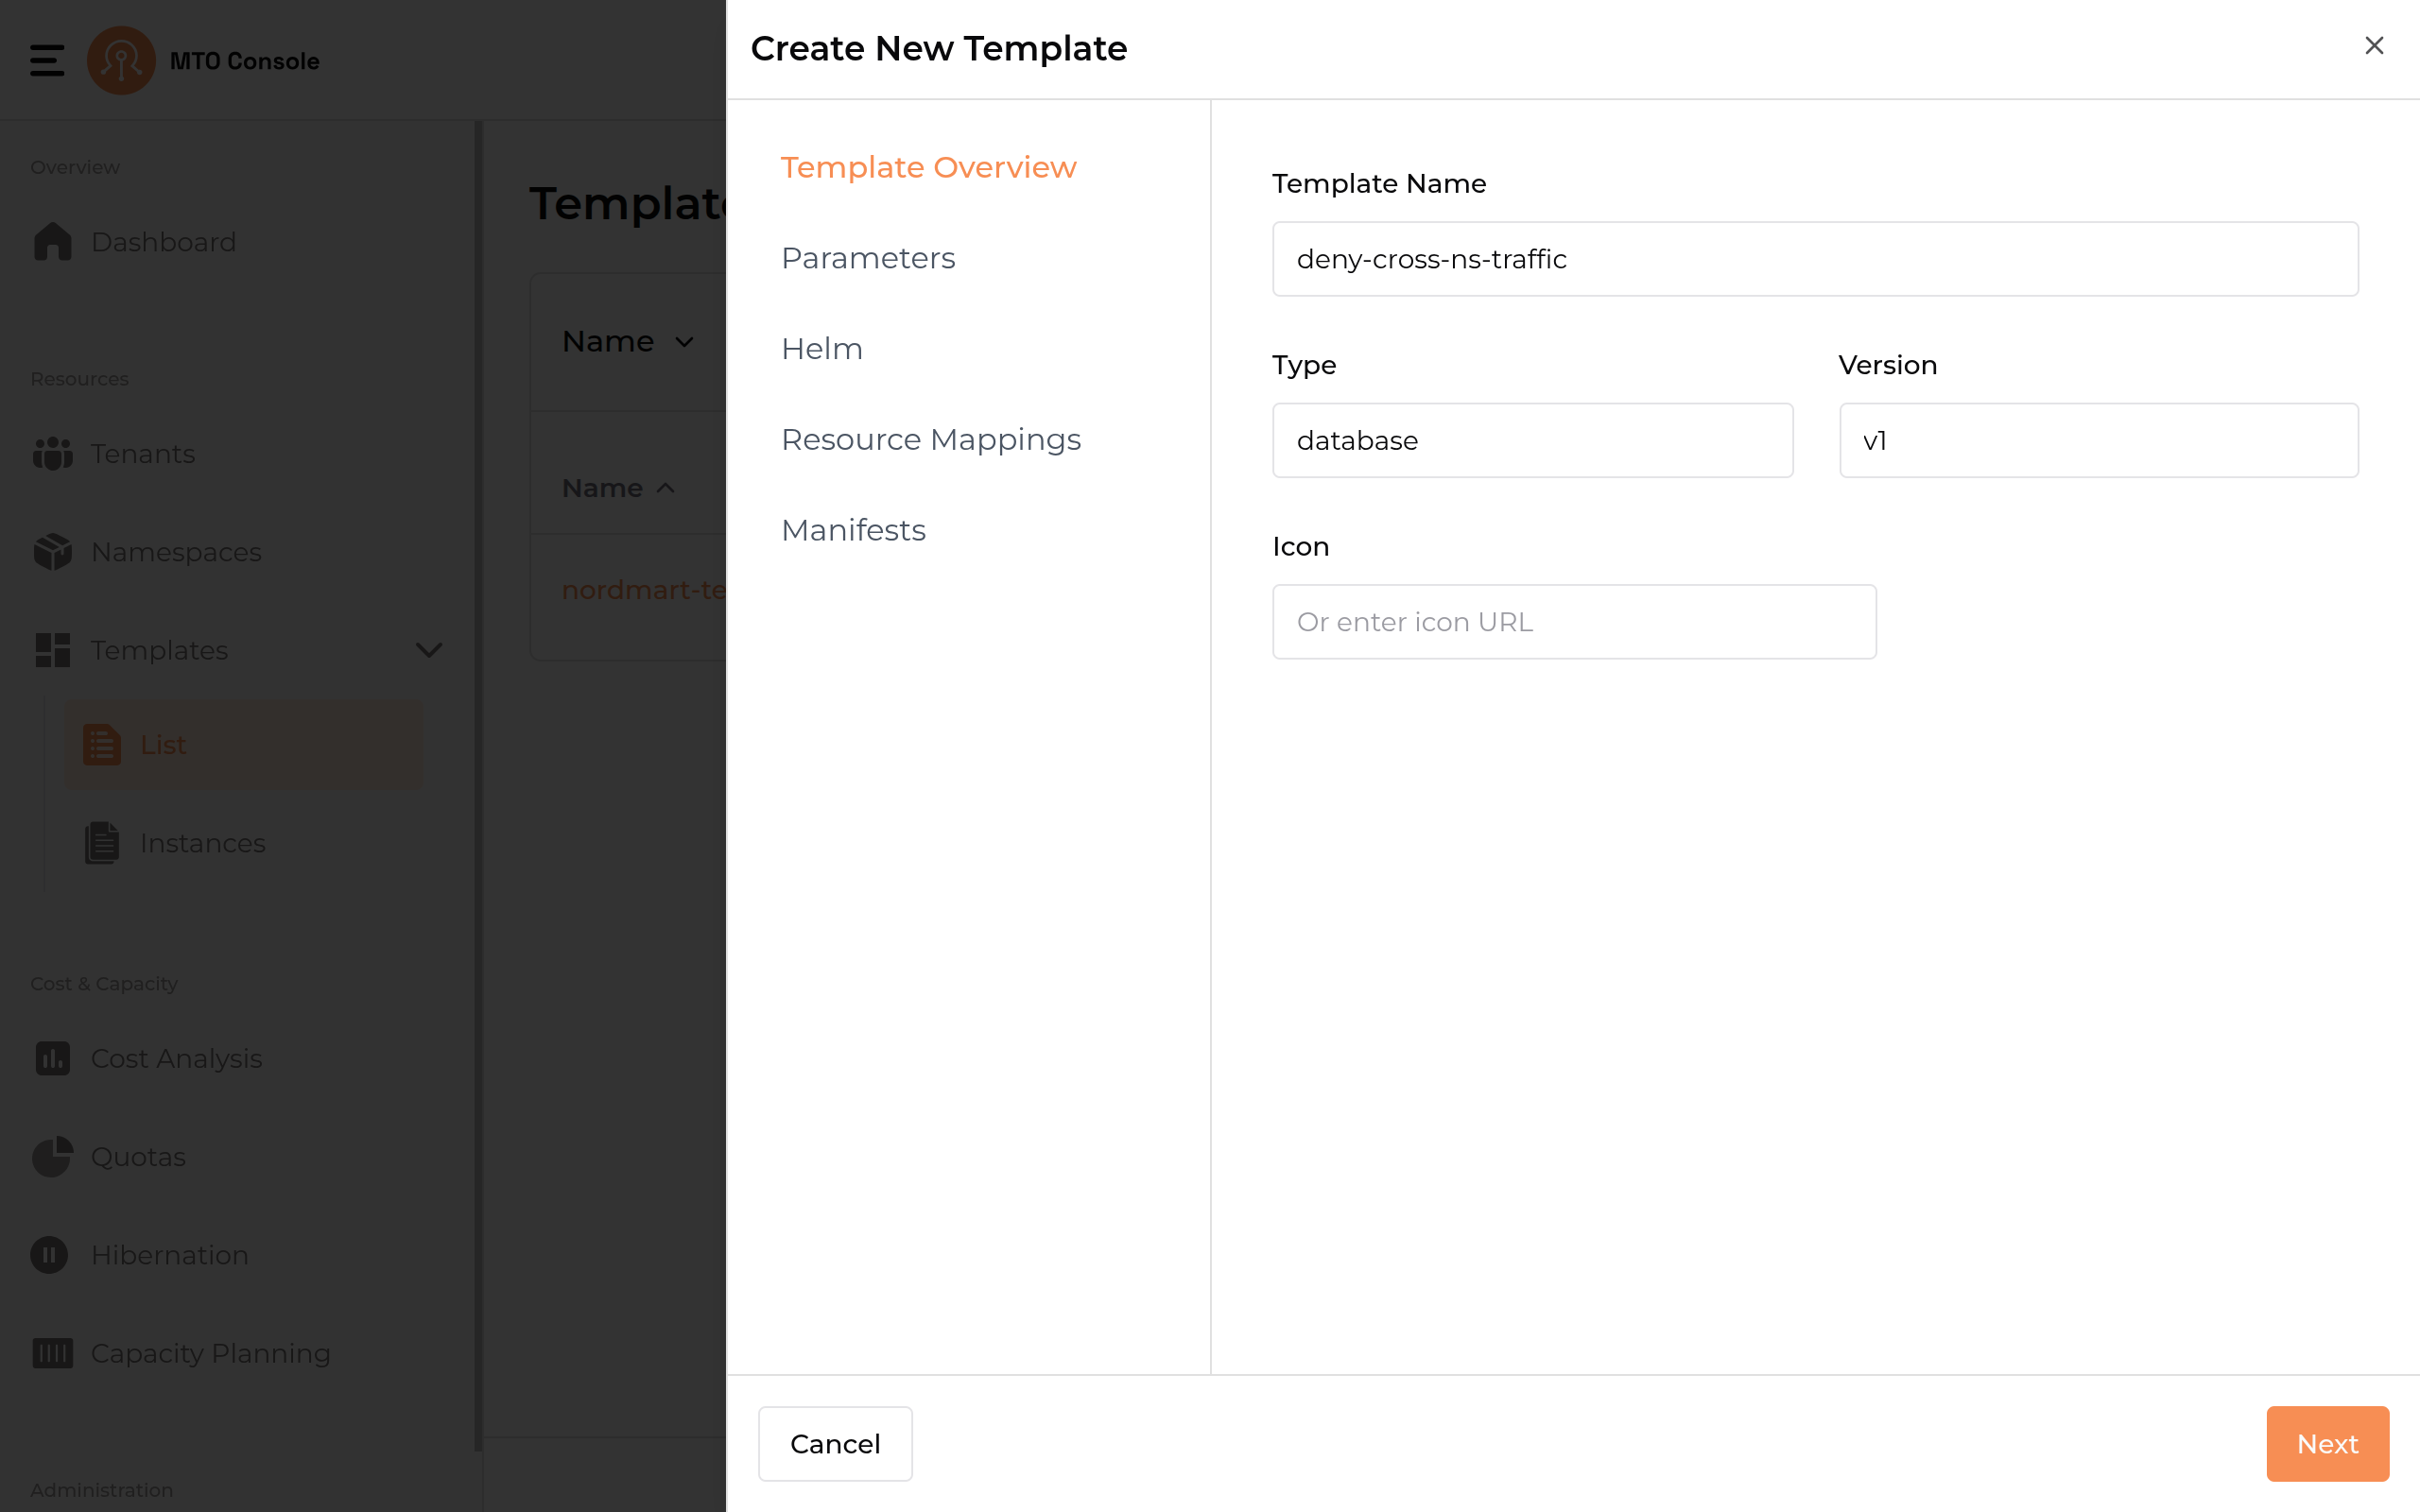
- Template Name The template name is a required field. Enter a unique and descriptive name for your template.
- Type Optionally specify the type of template.
- Version Optionally provide a version identifier for the template.
- Icon Optionally enter an icon URL to visually distinguish your template in the list view.
Parameters#
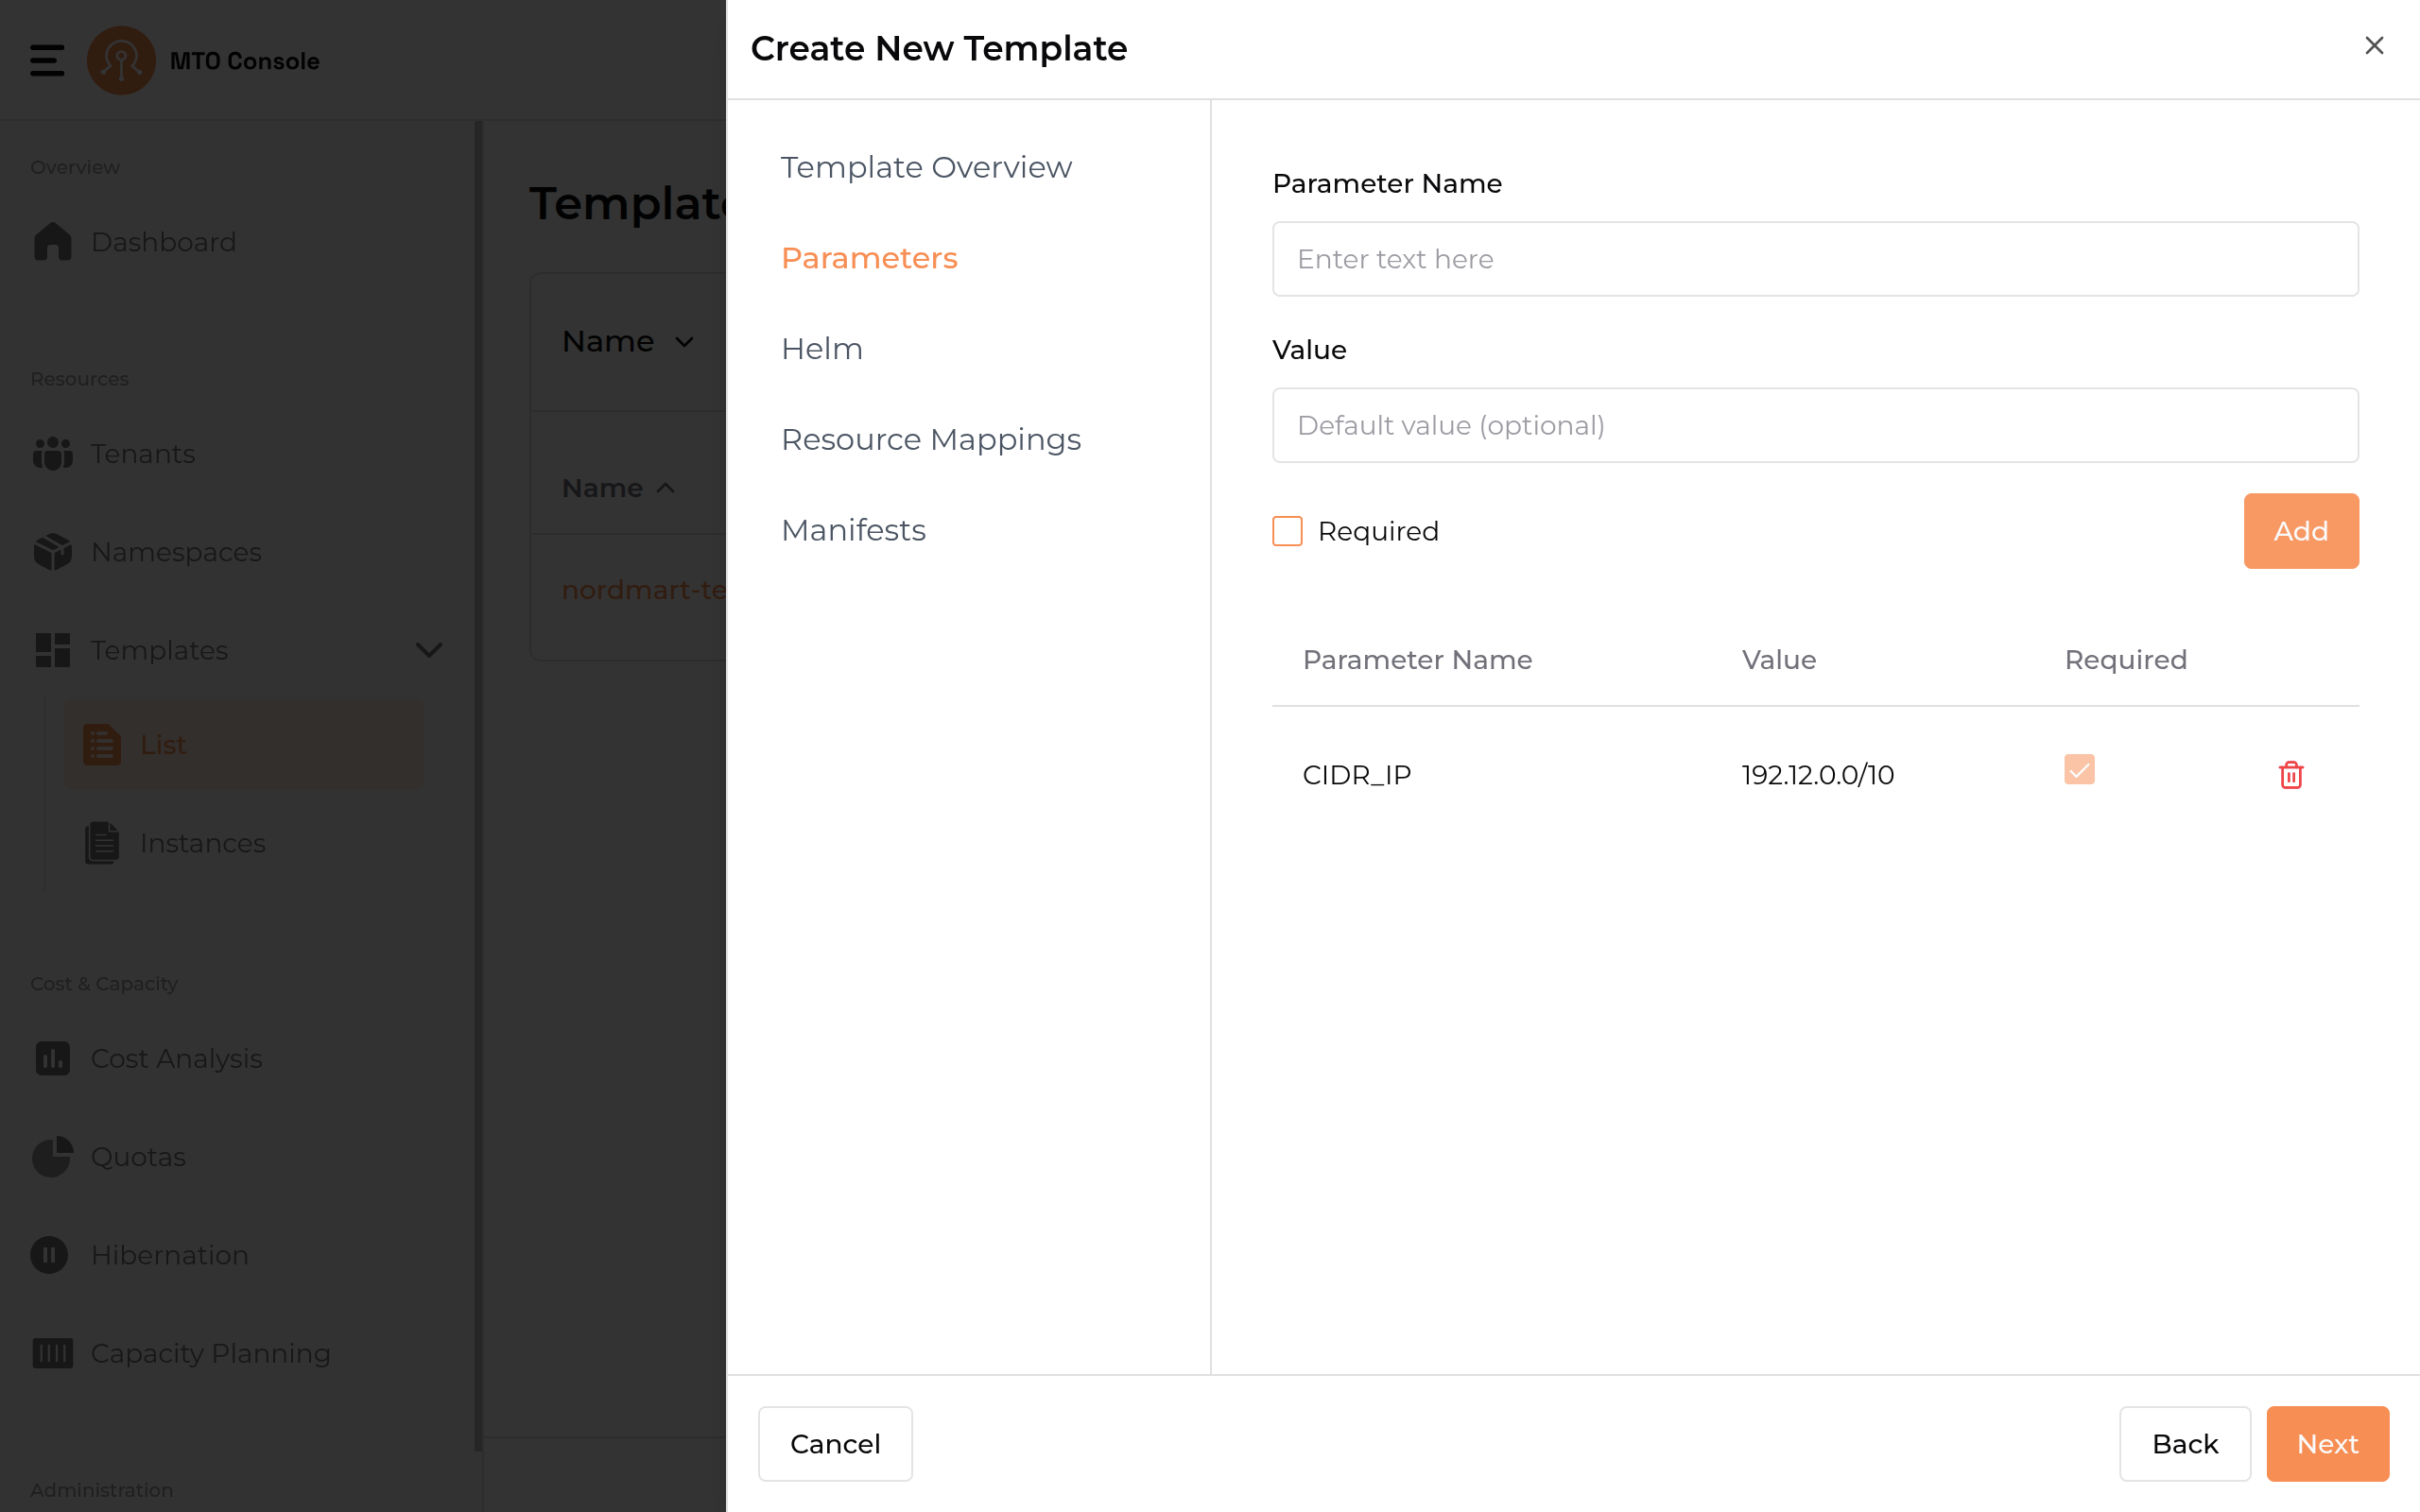
This section allows you to define parameters that can be used within your template for customization.
- Parameter Name & Value: Add key-value pairs to parameterize your template.
- Required Checkbox: Mark parameters as required if they must be provided when the template is instantiated.
- Add Button: Click to add each parameter to the list.
Parameters help make your templates flexible and reusable across different environments.
Resources#
At least one resource must be specified for the template. You can add resources in the following ways:
Helm#
Use this section to provide Helm chart details if your template is based on a Helm deployment.
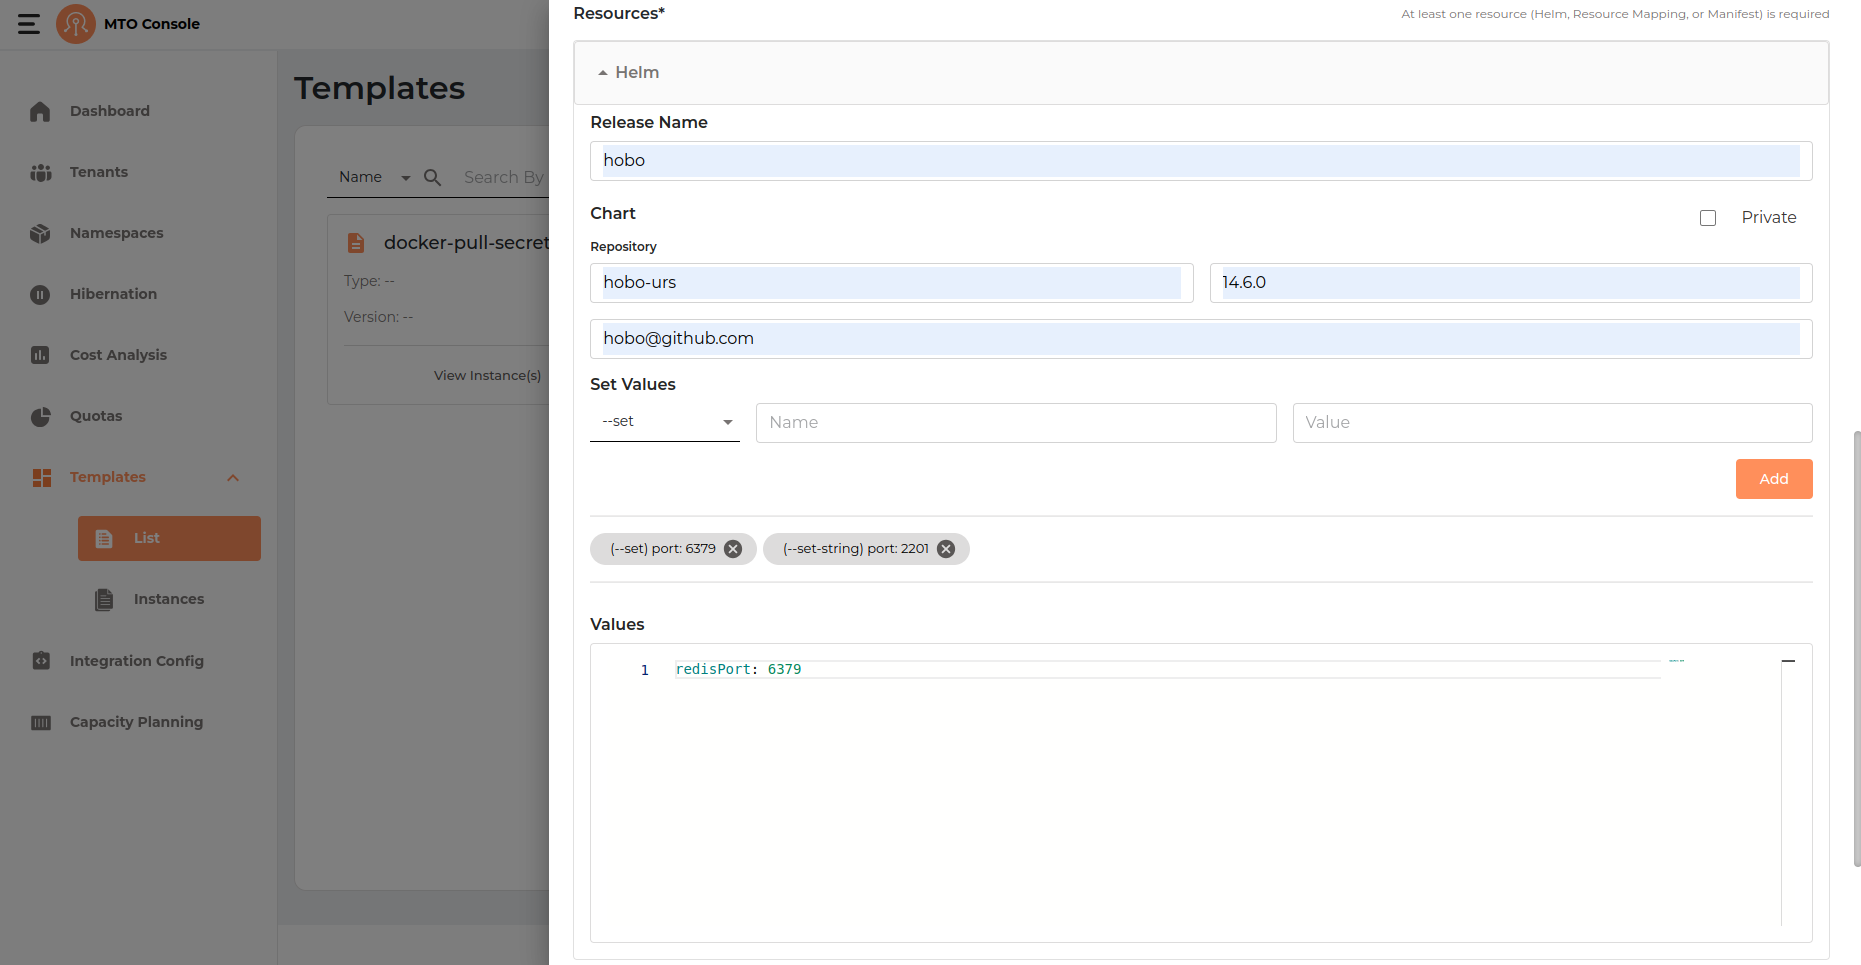
- Release Name: Enter a name for the Helm release. This will be used as the release identifier when the chart is deployed.
- Chart Name: Provide the name of the chart within the repository.
- Chart Version: Enter the version of the Helm chart you wish to deploy.
- Repository URL: Specify the URL of the Helm chart repository.
- Private Checkbox: If the Helm chart repository is private, check this box to indicate that authentication may be required.
- Set Values: You can specify custom values to override chart defaults using the
--setor--set-stringoptions.- Set Type: Select between
--set(for standard values) and--set-string(for string values). - Name & Value: Enter the key and value to set. Click Add to include each override. Added values are displayed as tags below the input fields, and can be removed if needed.
- Set Type: Select between
- Values: Optionally, you can provide a YAML block to specify multiple values at once. This is useful for more complex configurations or when you want to override several chart values together.
Example Value:
redisPort: 6379
Resource Mappings#
The Resource Mappings section allows you to define mappings for Kubernetes resources such as Secrets and ConfigMaps, enabling advanced or custom deployment scenarios. This is useful for referencing or distributing existing resources across different namespaces.
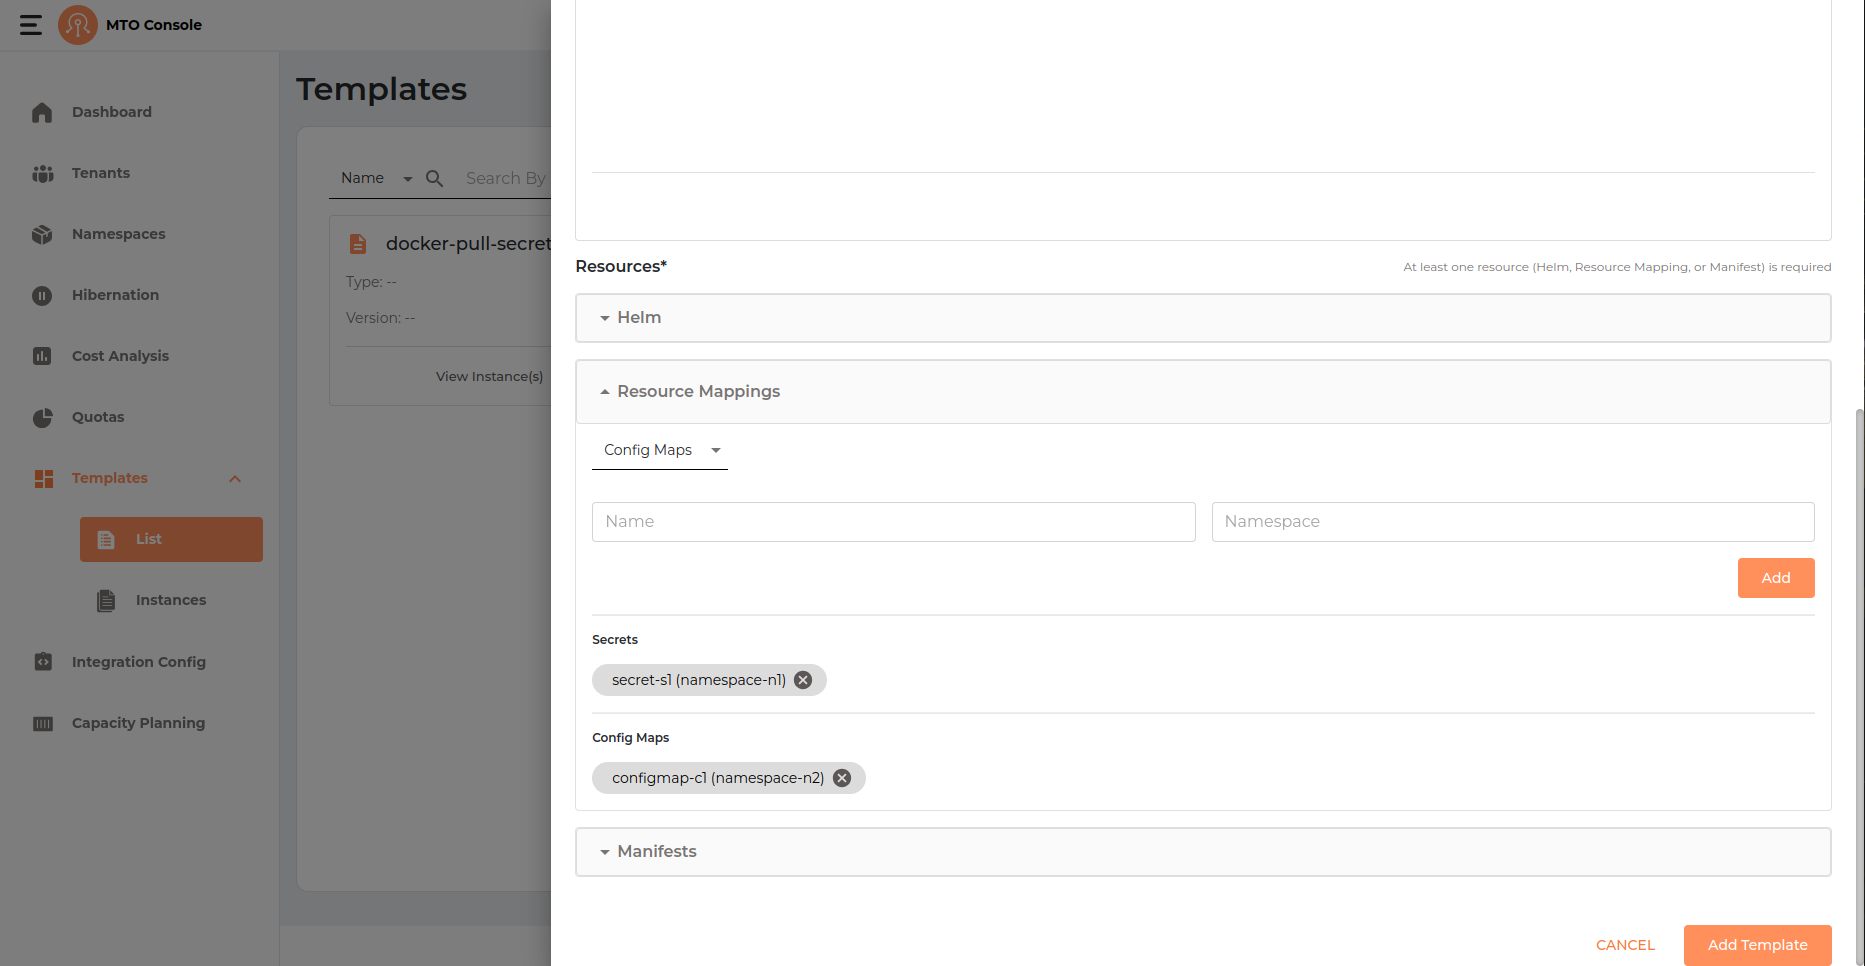
- Resource Type Dropdown: Select the type of resource you want to map. The available options are
- Secret
- ConfigMap
- Name & Namespace: Enter the name of the resource and the target namespace where it should be mapped.
- Add Button: Click Add to include the mapping in your template. Each mapping will appear as a tag below the input fields showing the resource name.
- Listing and Removal: Added mappings are displayed in separate sections for Secrets and Config Maps. Click the "X" on a tag to remove a mapping from the template.
Manifests#
The Manifests section allows you to add raw Kubernetes manifests directly to your template. This is useful for provisioning standard Kubernetes resources such as Deployments, Services, ConfigMaps, Secrets, NetworkPolicies, and more, using YAML definitions.
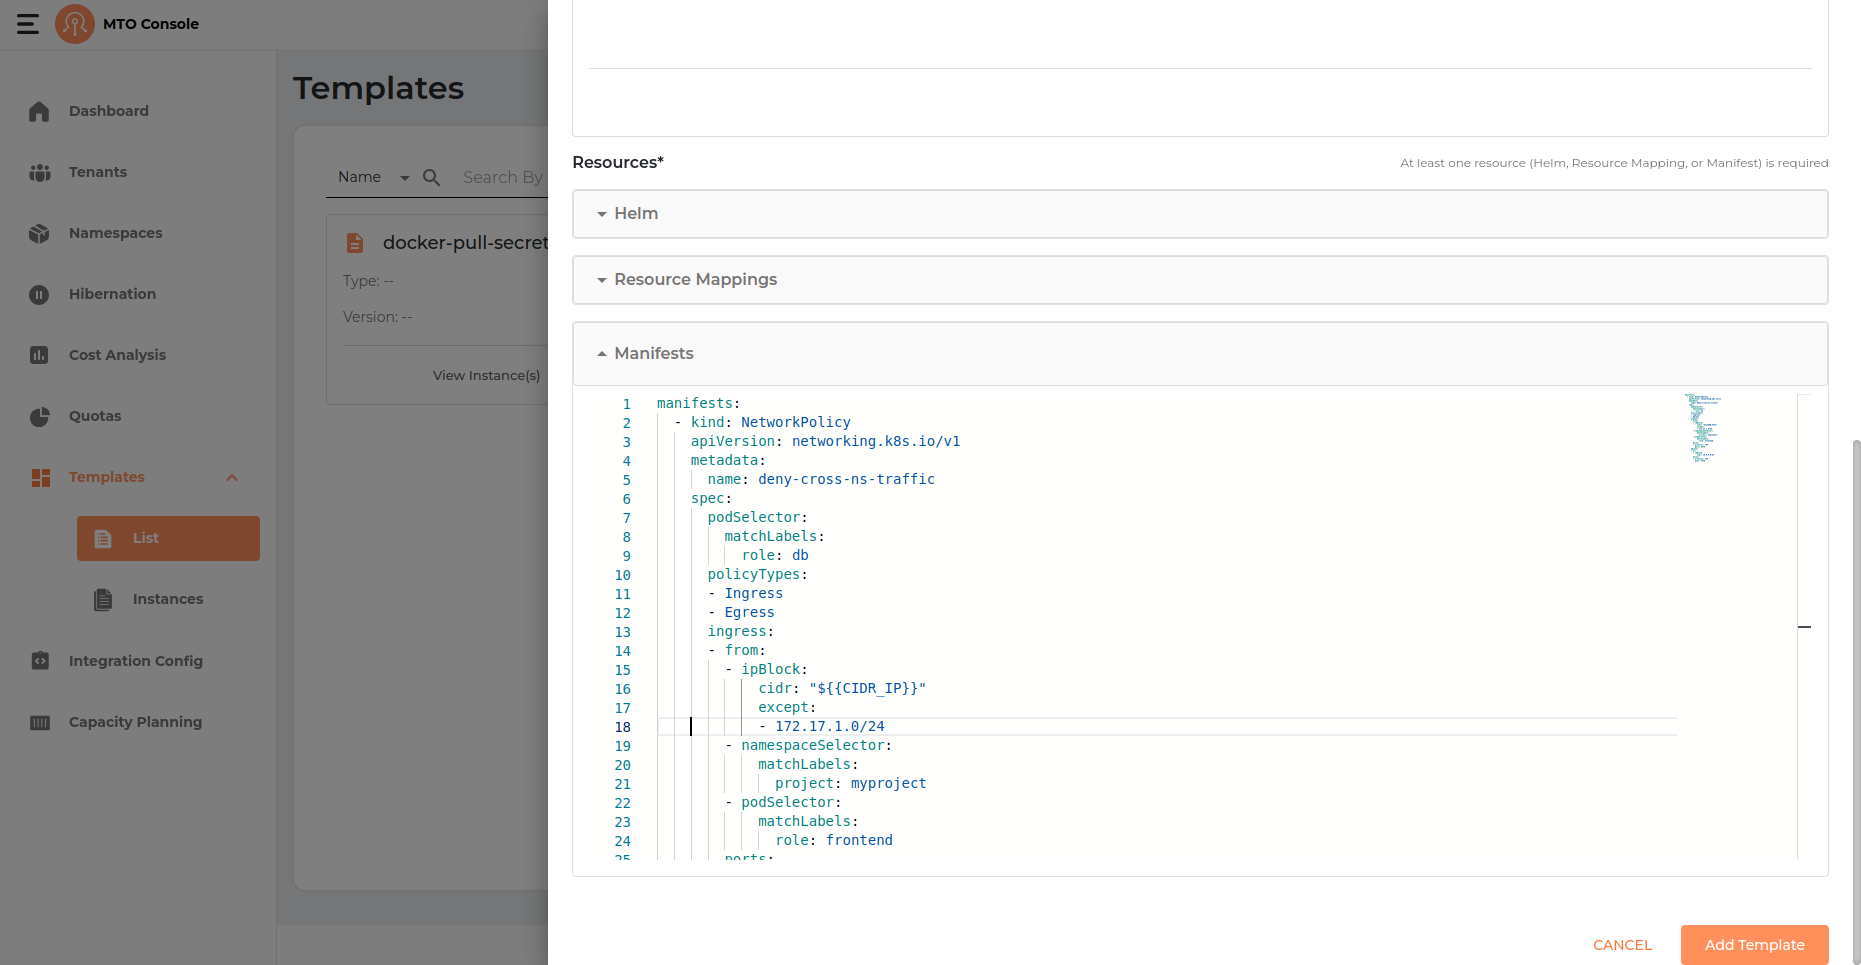
- YAML Editor: Enter one or more Kubernetes resource definitions in YAML format. Each manifest should follow standard Kubernetes syntax and can include any supported resource kind.
- Multi-Resource Support: You can define multiple resources in a single template by listing them under the
manifests:key as a YAML array. - Parameters: You may use template parameters (defined in the Parameters section) within your manifests for dynamic substitution at deployment time. For example,
${PARAM_NAME}can be used as a placeholder for values provided during instantiation. - Validation:
- The editor provides basic YAML validation to help ensure your manifests are correctly formatted before adding the template.
- If any parameter added to the manifest is missing from the added parameters list in the template and is set to required will result in an error on the top of the manifest indicating the user to add that parameter to the list.
Save Template#
Once all required configurations are completed, click the Create button to save the template.
YAML View#
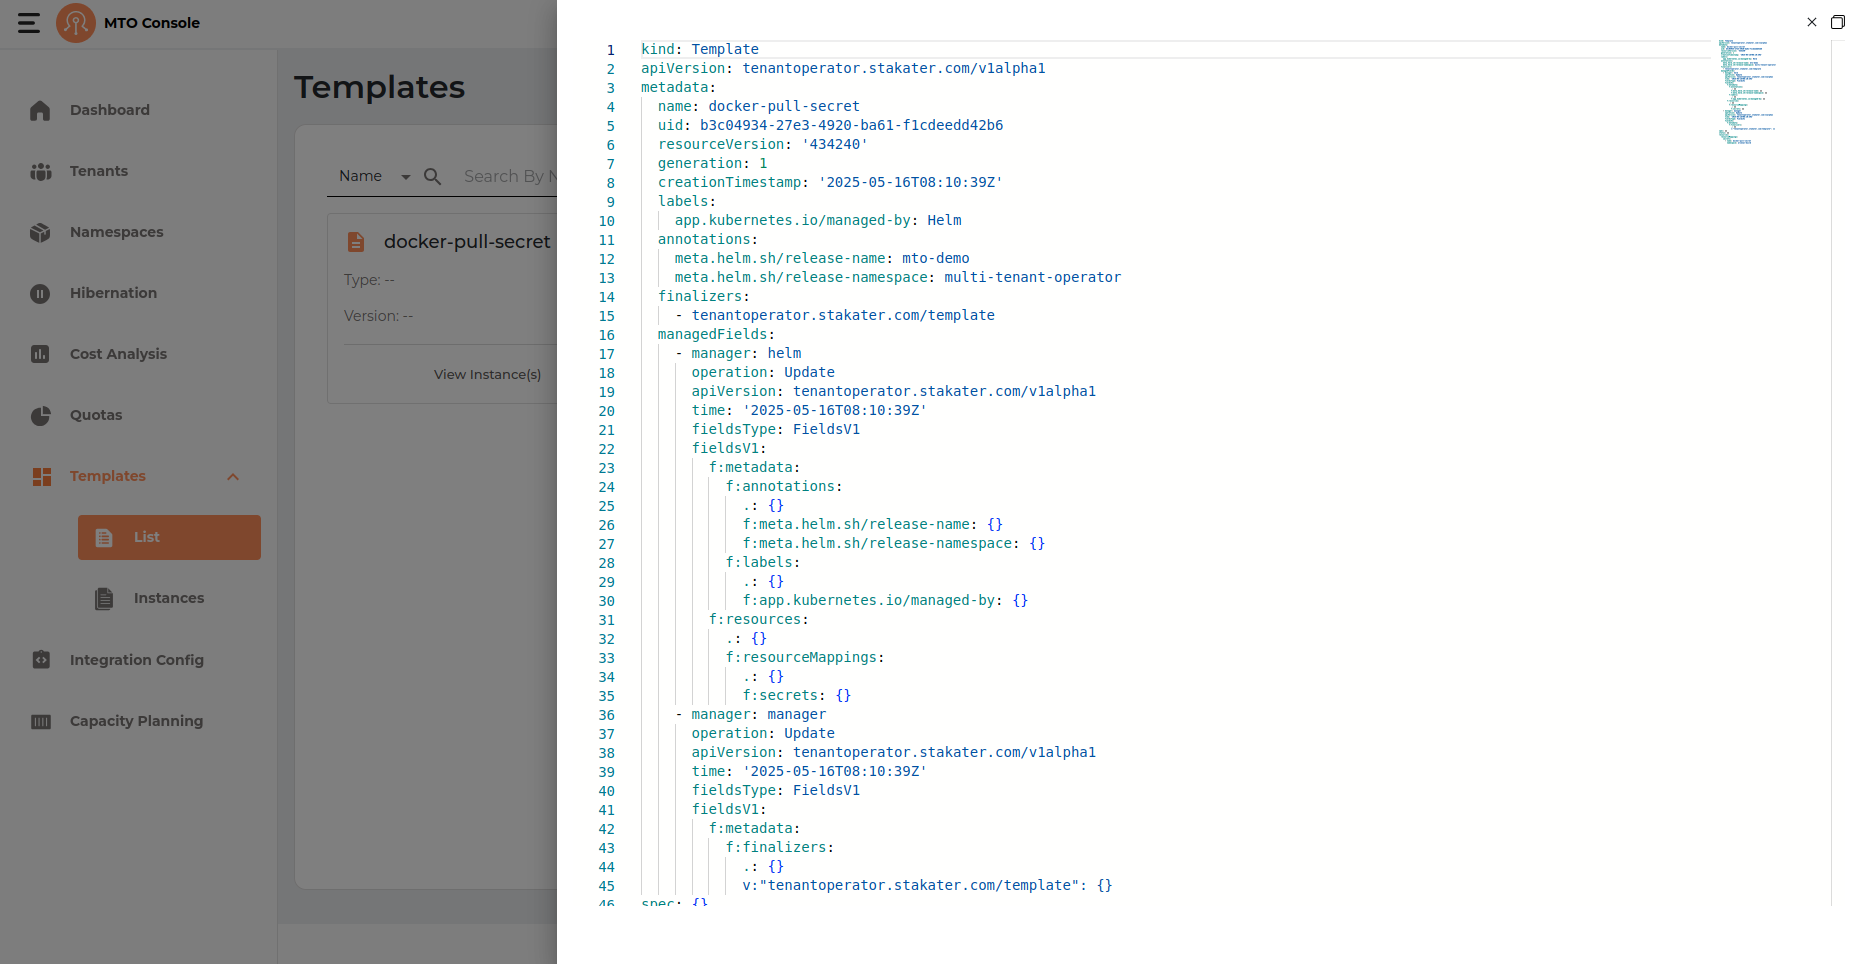
A YAML representation of the template configuration can be previewed by selecting View YAML from the Actions kebab menu on a template row.
Update Template#
Selecting Edit from a template's Actions kebab menu on the Templates list page opens the same stepper drawer with all fields pre-populated. This flow is similar to the create flow, except the template name cannot be changed or modified.
Delete Template#
- The Actions kebab menu on a template row provides a Delete option.
- A template can only be deleted if it does not have the
In Usebadge on it.