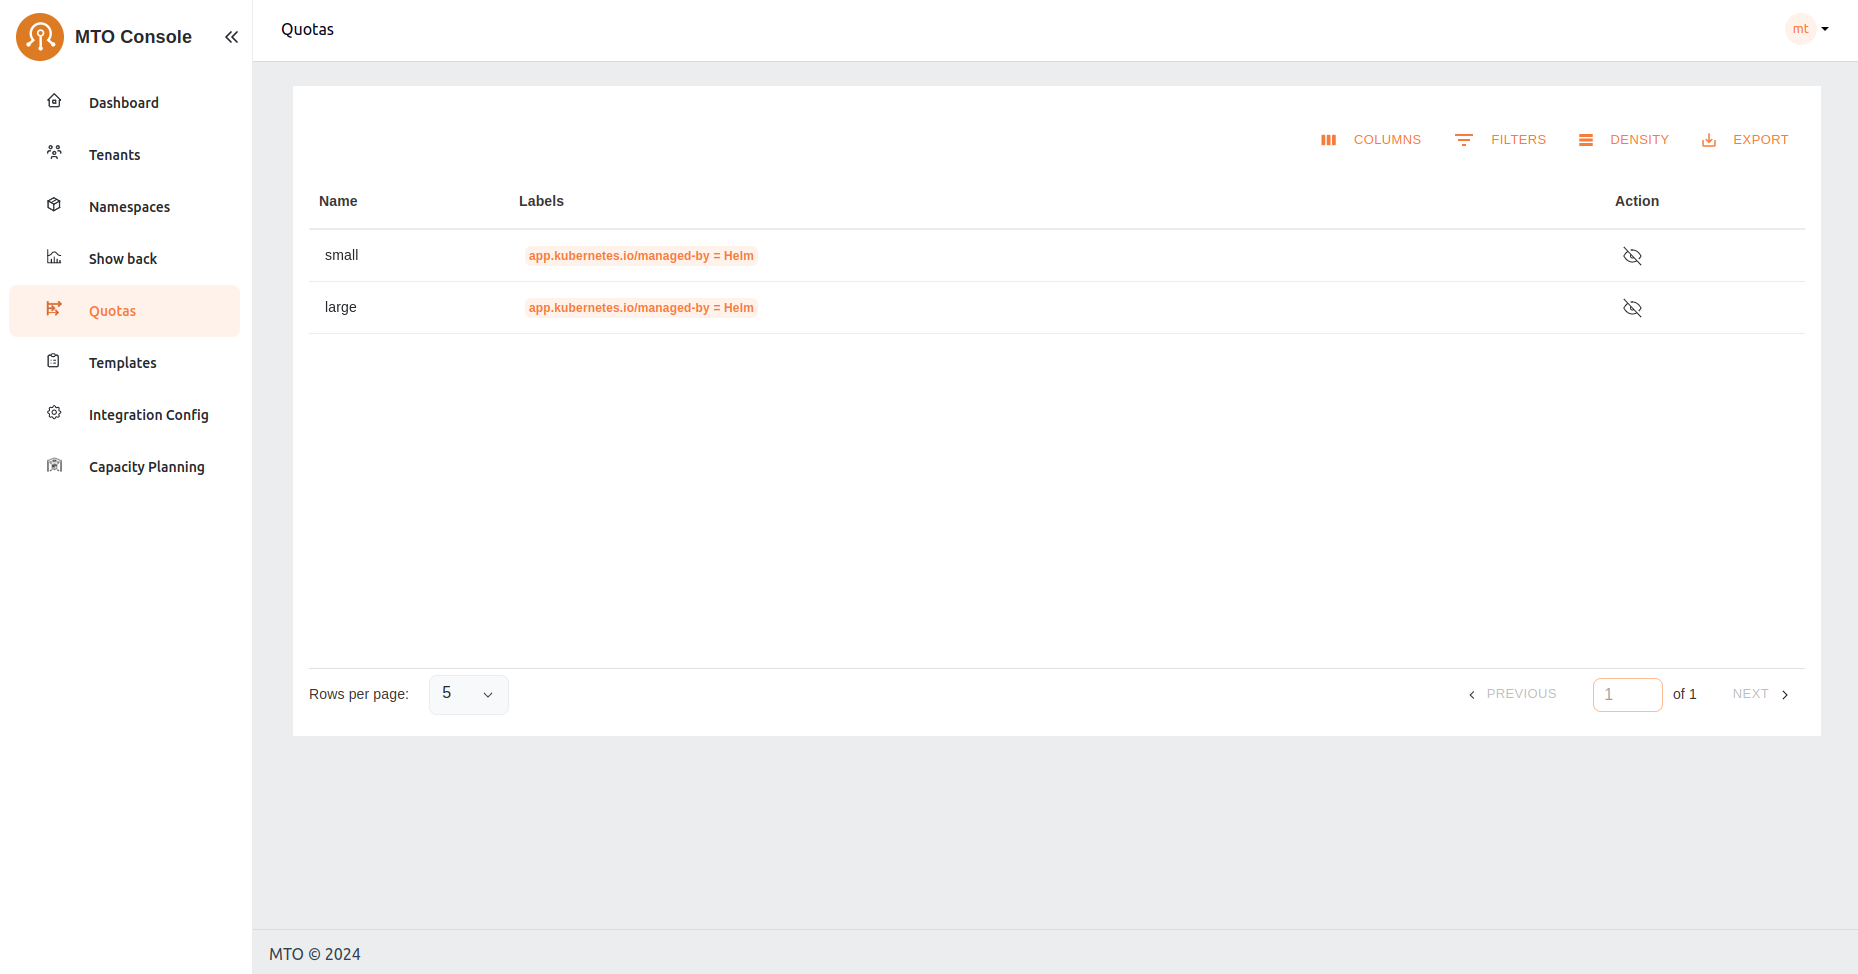
Quotas#
MTO's Quotas are crucial for managing resource allocation. In this section, administrators can assess the quotas assigned to each tenant, ensuring a balanced distribution of resources in line with operational requirements.
Create Quota#
Click the Create Quota button on the top-right of the Quotas page to open the creation drawer. The drawer uses a stepper layout with the following navigation items: Quota Overview, Limit Range (Optional), Container (Optional), and Pod (Optional).
Step 1: Quota Overview#

This step combines the quota name and the resource quota definitions.
-
Metadata Name
- The name field is mandatory and must be unique.
- If the name already exists, an inline error message is displayed.
-
Error Handling
- Regex Validation
- The quota name must conform to the following regex pattern:
/^[a-z0-9]+(-[a-z0-9]+)*$/- This ensures that quota names consist of lowercase alphanumeric characters and hyphens, and do not start or end with a hyphen.
- Users must ensure the quota name meets the specified criteria. Also, the quota name should not already exist in order to create a new quota.
Resource Quota#
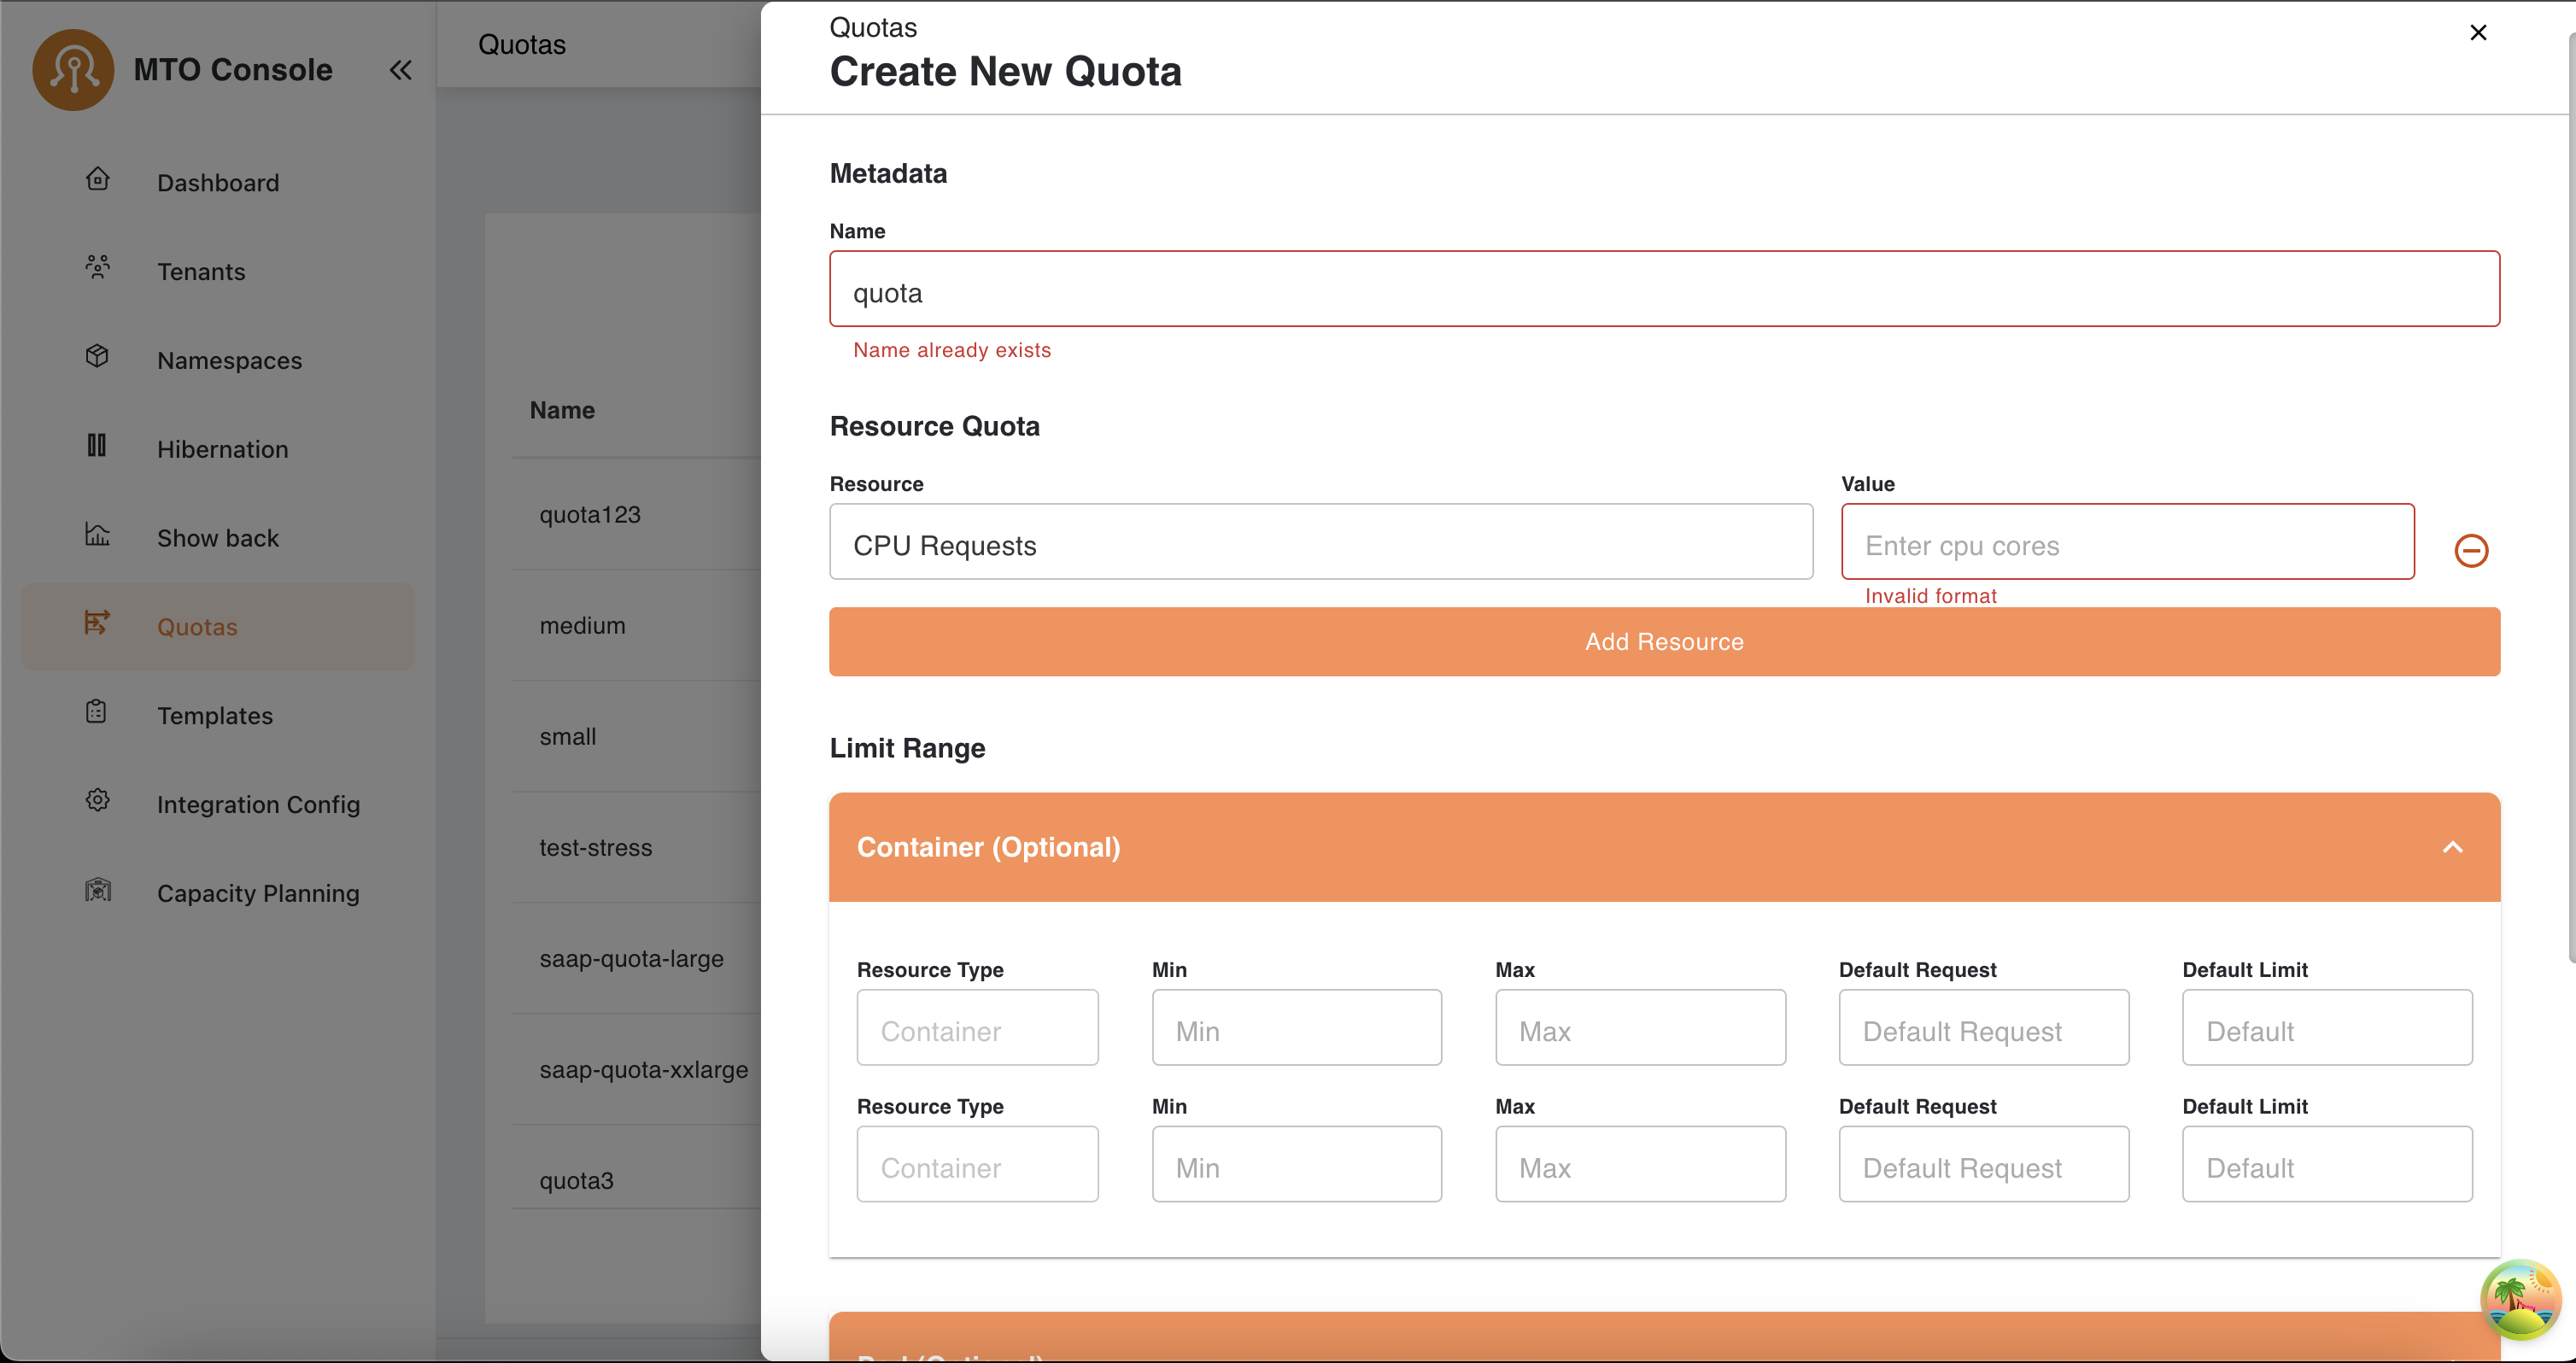
- Adding Resources
- The Resource Type dropdown allows the selection of common resource types such as:
- CPU Requests
- Memory Requests
- Config Maps
- Secrets
- Services
- Load Balancer Services
- Custom resources can also be entered (for example,
nvidia.com/gpu). -
Enter the corresponding Value for the selected resource (for example,
10,100Gi,2000m). -
Error Handling
-
If an invalid format is entered in the Value field, an inline error message is displayed.
-
Add Resource Button:
- Allows users to add multiple resources sequentially.
Step 2: Container (Optional)#
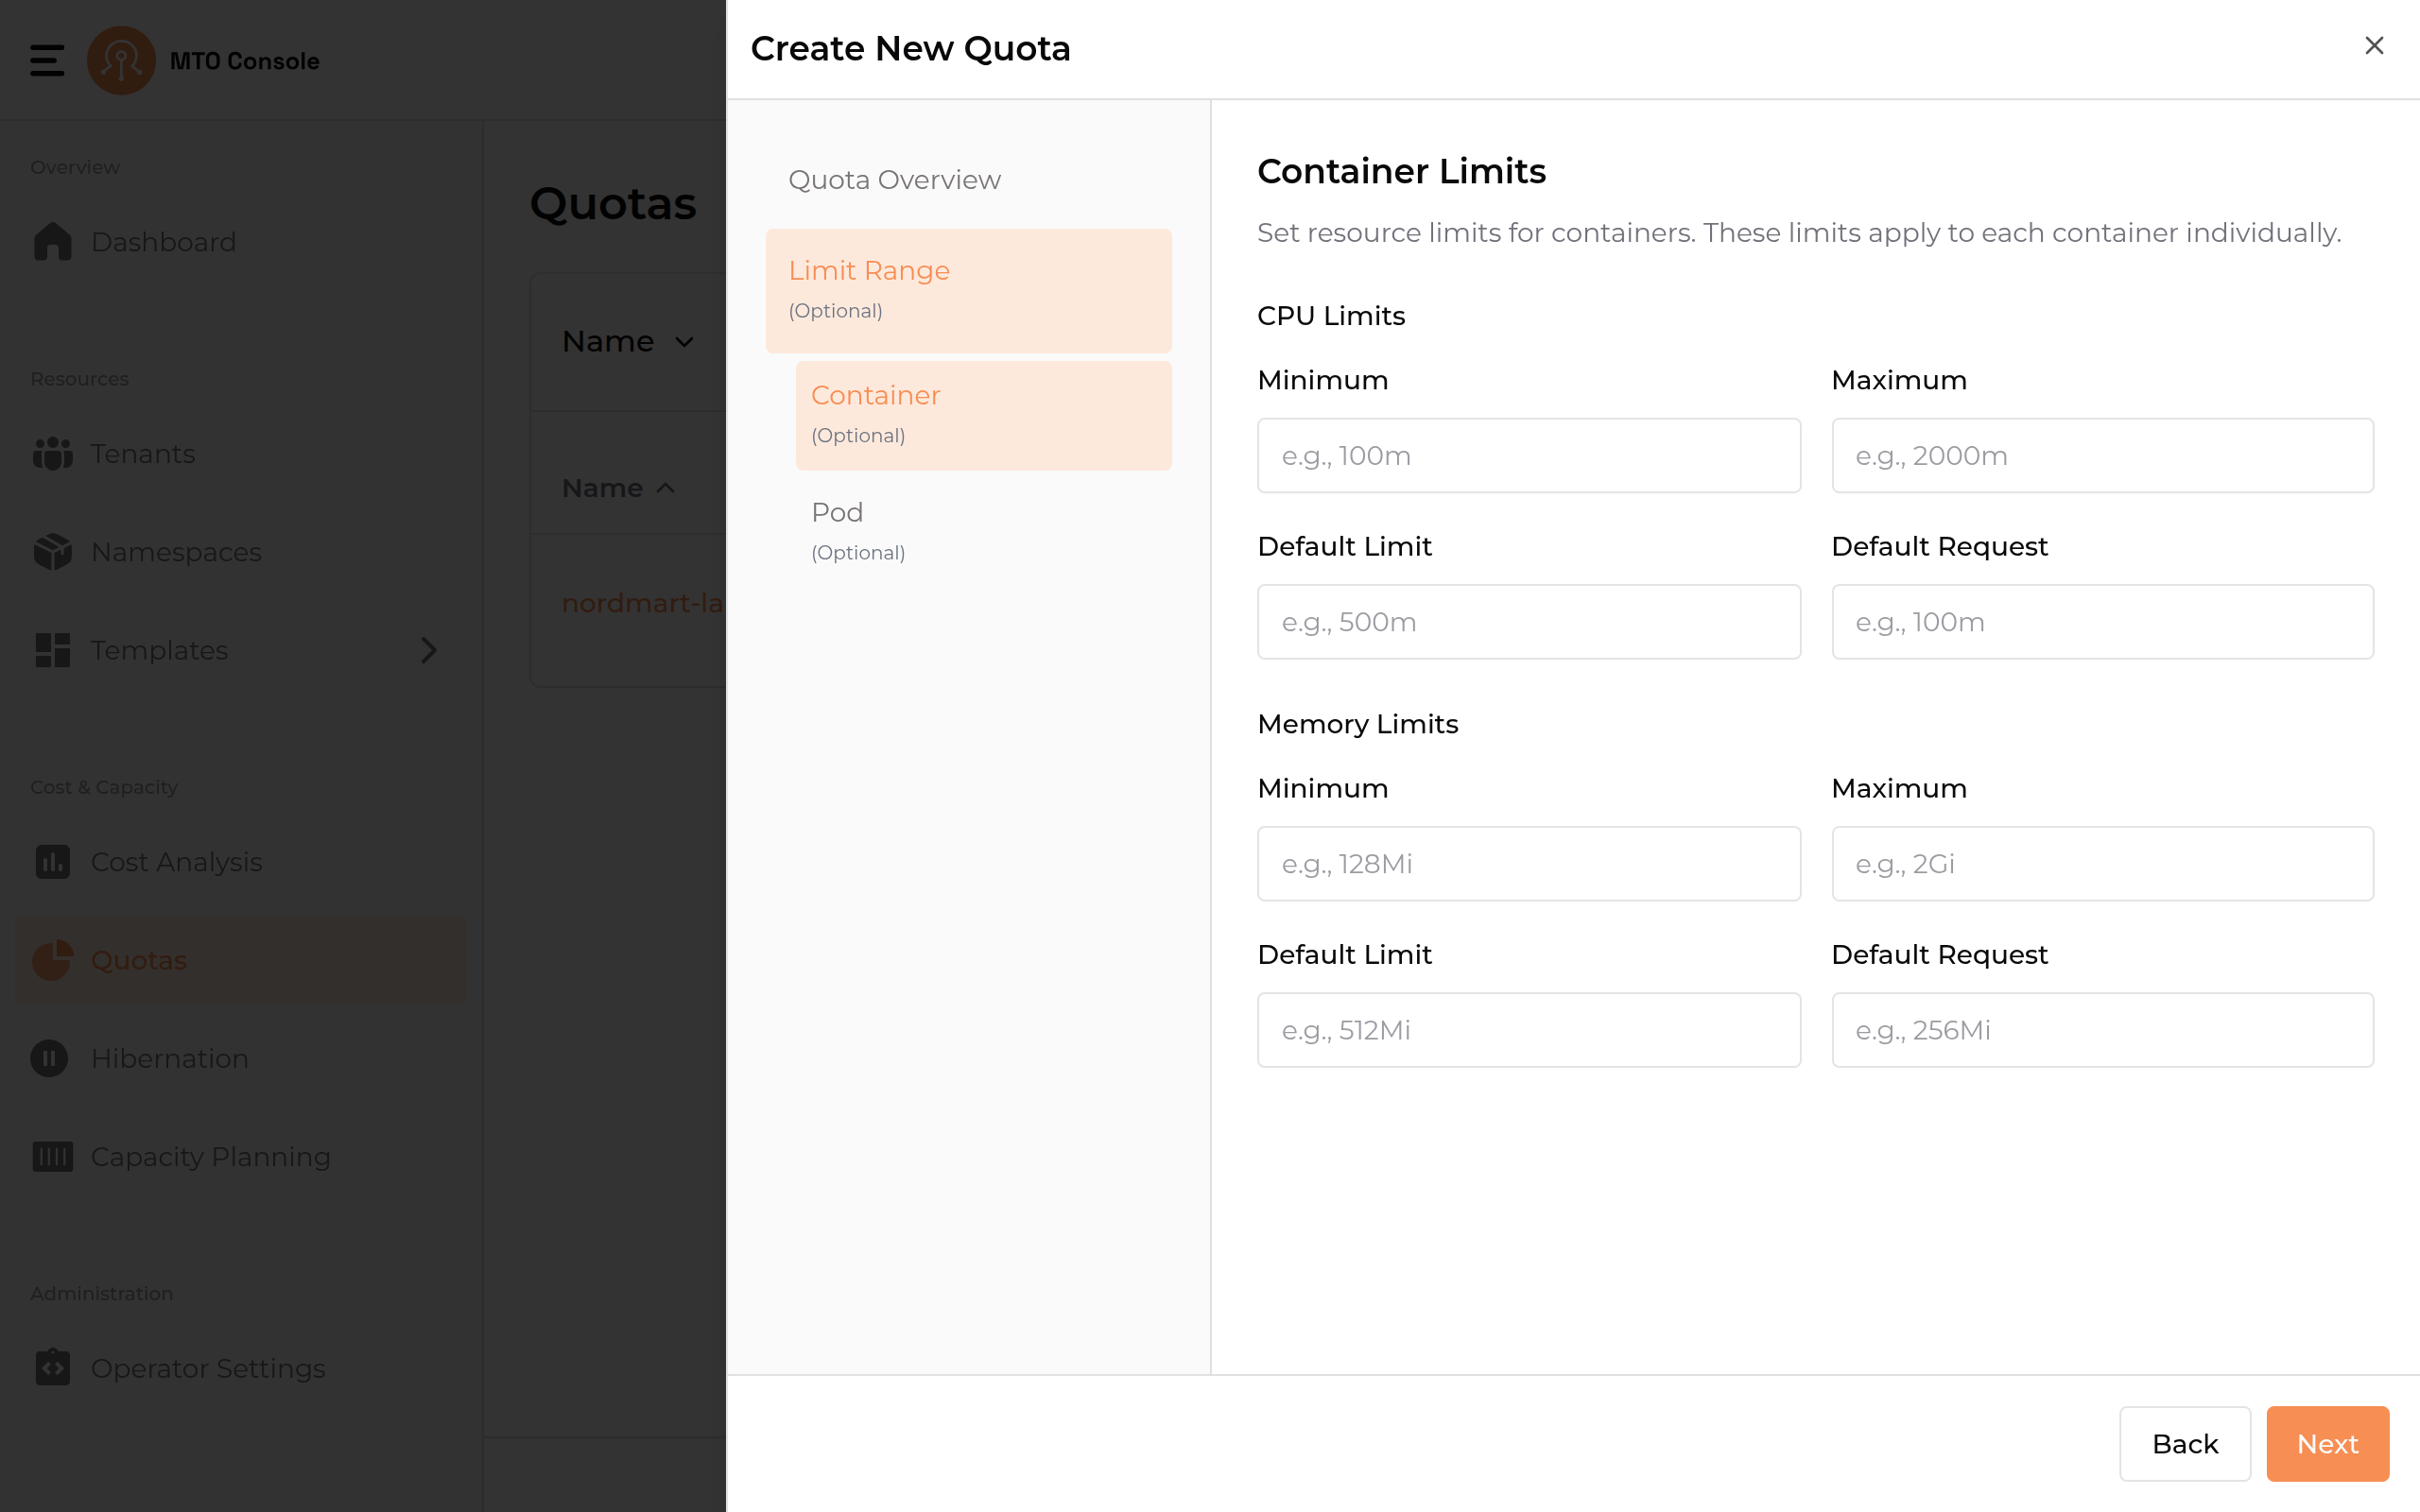
Sets resource limits that apply to each container individually. The page is split into CPU Limits and Memory Limits sections, each accepting:
- Minimum
- Maximum
- Default Limit
- Default Request
Error Handling#
- Inline errors guide users in correcting their inputs.
Step 3: Pod (Optional)#
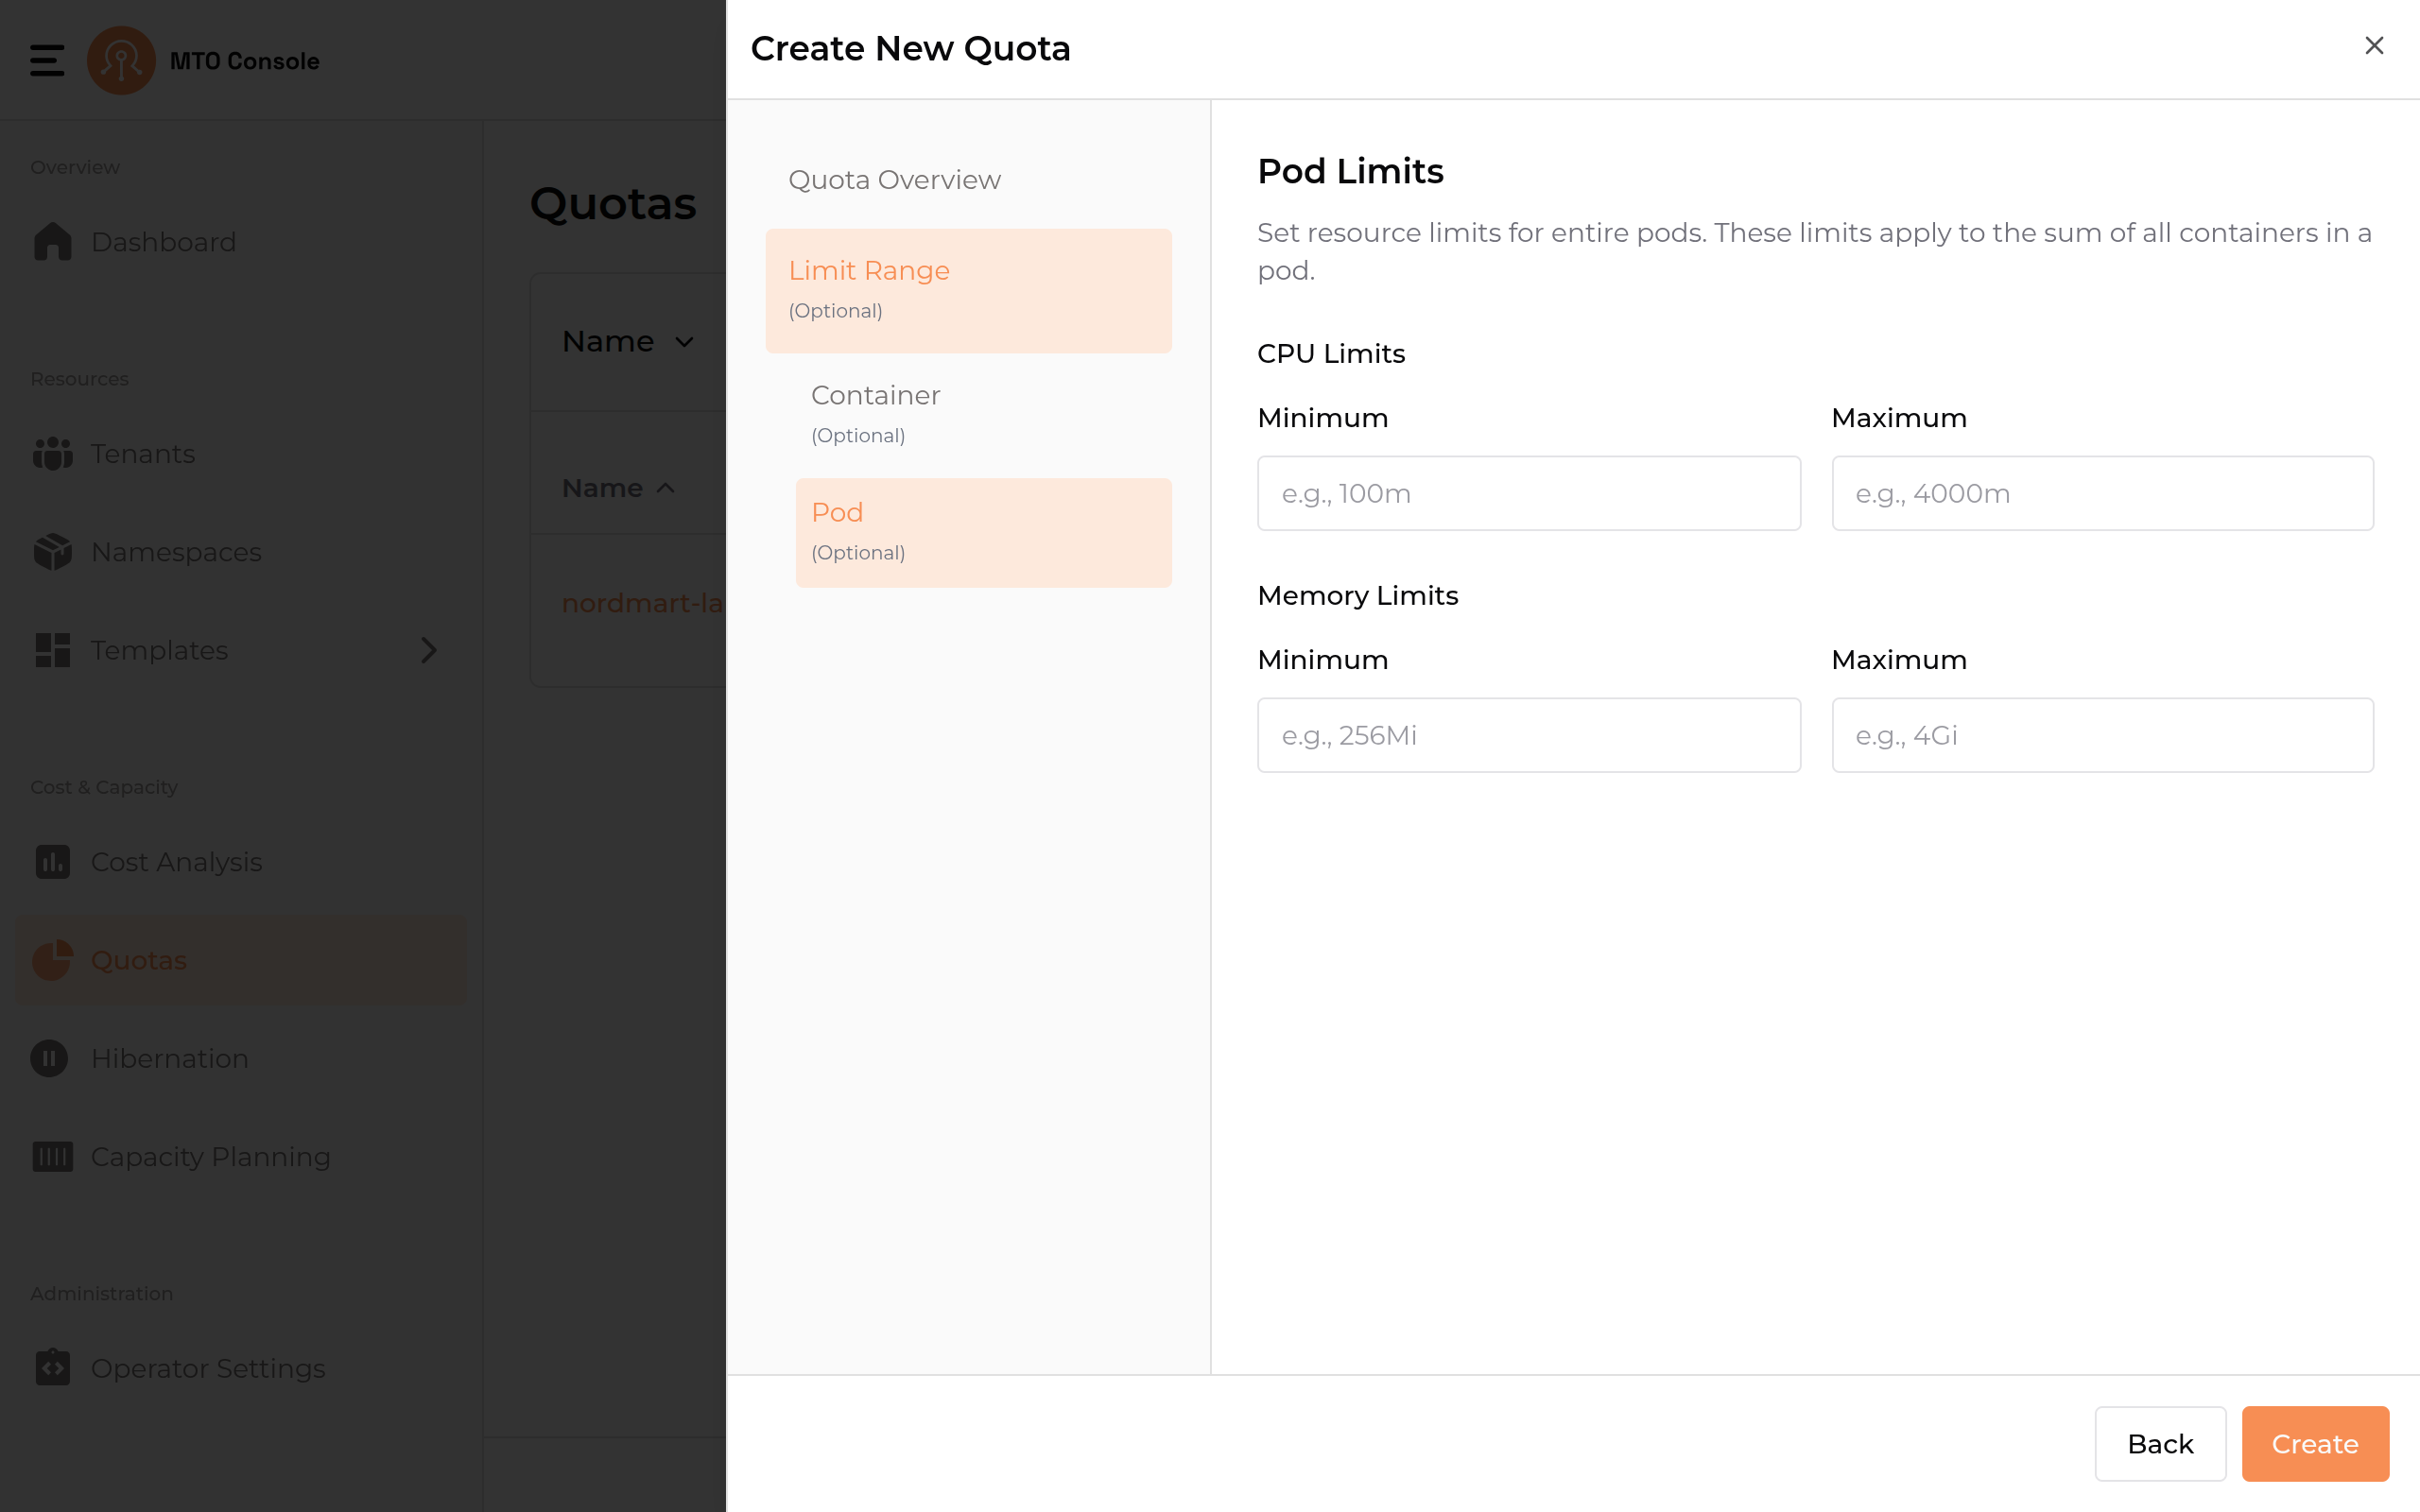
Sets resource limits that apply to the sum of all containers in a pod. The page is split into CPU Limits and Memory Limits sections, each accepting only:
- Minimum
- Maximum
Unlike the Container step, Pod limits do not include Default Limit or Default Request fields.
Error Handling#
- No validation errors occur unless an invalid value is entered.
- Inline errors guide users in correcting their inputs.
Final Step: Save Quota#
- Create Button
-
Once all configurations are completed, users can click the Create button to save the quota.
-
Completion
- The system validates all input fields before saving.
- A confirmation message is displayed once the quota is successfully created.
Notes#
- The entire quota creation process is intuitive, with inline validation to guide users.
- Limit Range, Container, and Pod steps are all optional and can be skipped.
Update Quota#
From the Actions column on the Quotas list page, click the three-dot menu on a quota row and select the edit option to open the drawer with all the pre-populated quota configurations.
The update process follows the same stepper as the create process. The key difference is that the Metadata Name in Quota Overview cannot be edited or updated. All other steps and configurations remain the same, allowing users to modify resource quota and limit range values as needed.
Delete Quota#
From the Actions column on the Quotas list page, click the three-dot menu on a quota row and select the delete option. A confirmation modal will prompt the user to delete or cancel the operation.
View YAML#
From the Actions column on the Quotas list page, click the three-dot menu on a quota row and select the YAML option to view the quota's YAML representation.