Explore OpenShift
The Web Console
OpenShift ships with a web-based console that will allow users to perform various tasks via a browser.
Access your cluster from OpenShift Web Console.
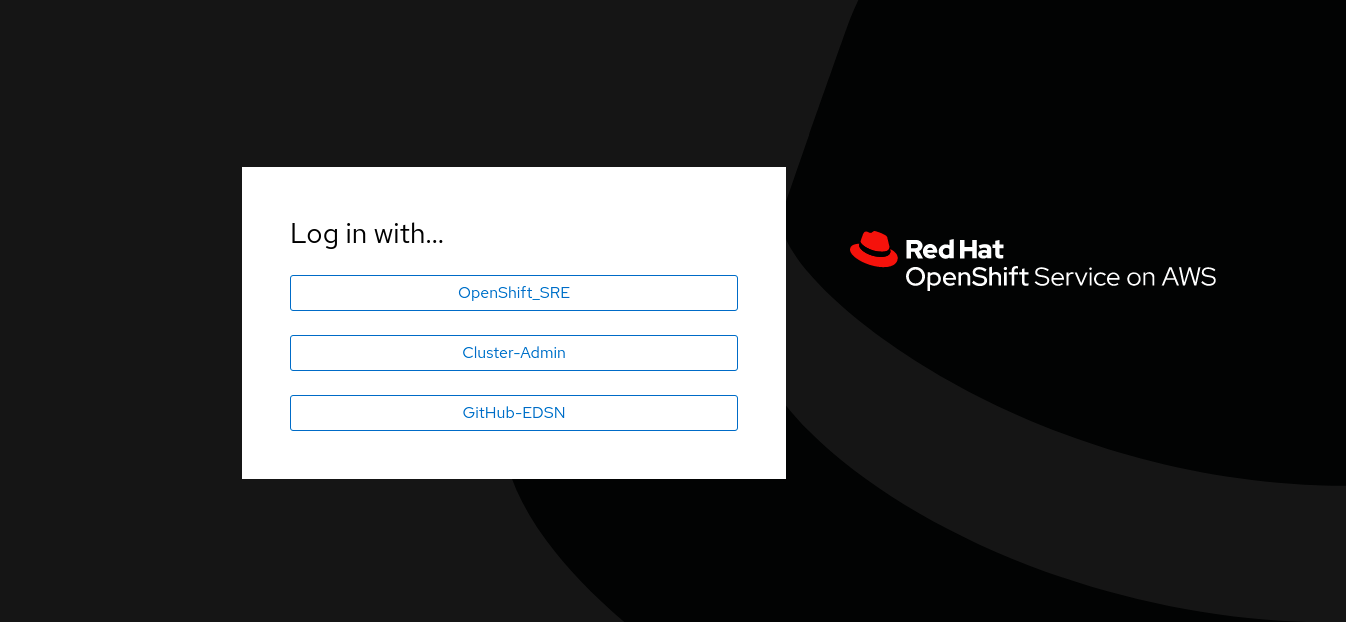
Login to your SAAP cluster using one of the available options

On the Identity Provider login screen, enter the your credentials:
Username:
%USERNAME%Password:
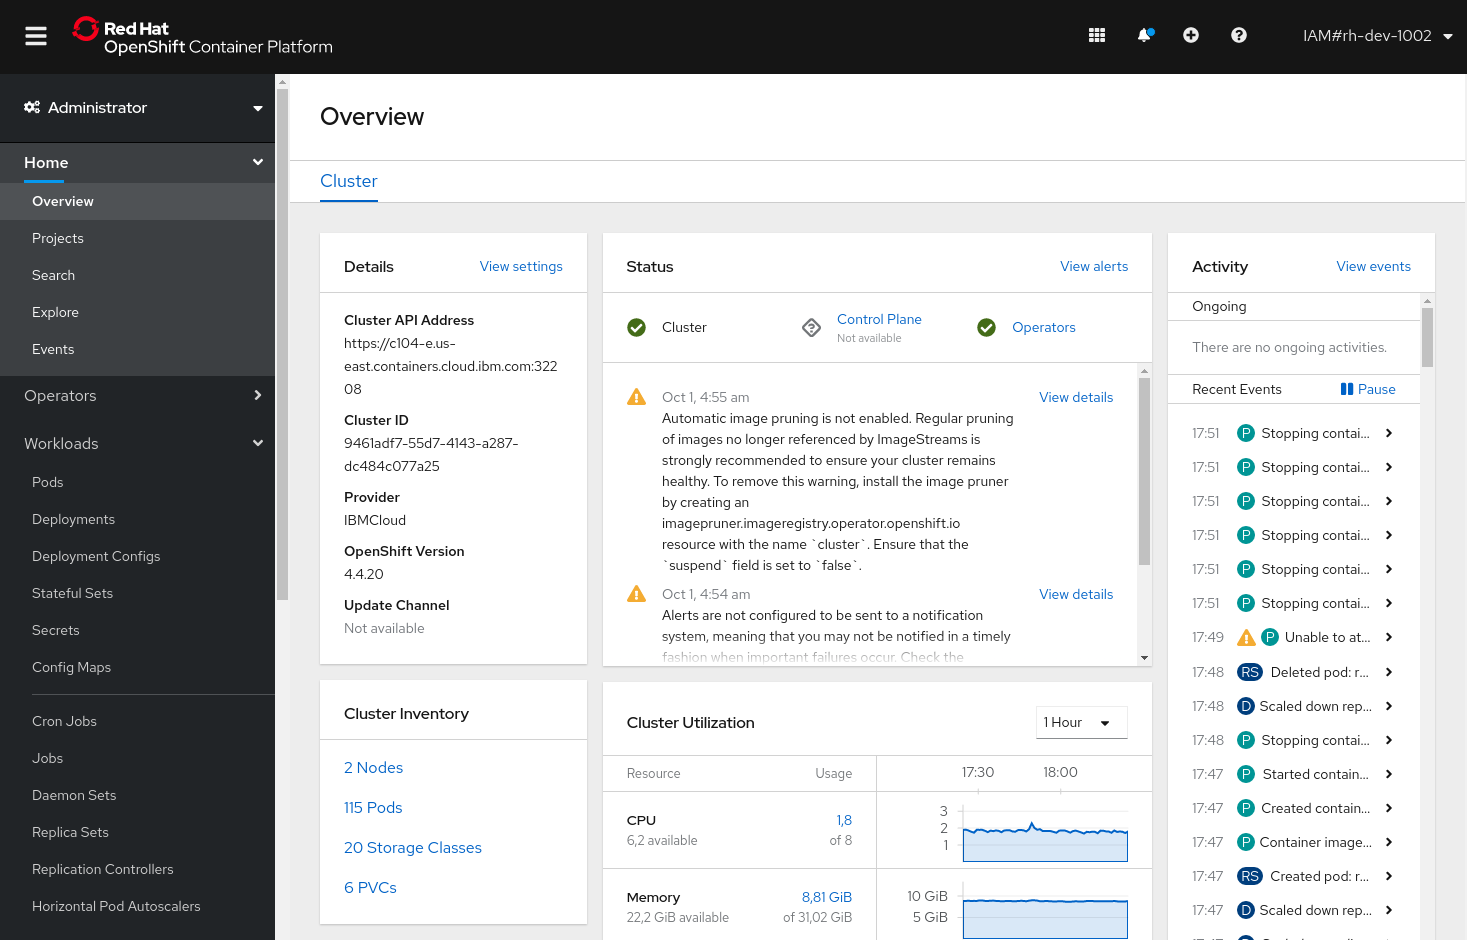
%PASSWORD%The first time you access the web console, you will most likely be in the Administrator perspective. If you are also the Cluster Administrator, you will be presented with an overview of the whole Cluster status:

Command Line Interface
OpenShift ships with a feature rich web console as well as command line tools to provide users with a nice interface to work with applications deployed to the platform. The OpenShift tools are a single executable written in the Go programming language and is available for the following operating systems:
-
Microsoft Windows
-
Mac OS X
-
Linux
You might already have the OpenShift CLI available on your environment. You can verify
it by running an oc command:
oc versionYou should see the following (or something similar):
Client Version: 4.7.13
Server Version: 4.7.0 (1)
Kubernetes Version: v1.20.0+bd9e442| 1 | NOTE: you will only see the Server Version and Kubernetes Version if you are currently connected to a Kubenetes or OpenShift cluster |
If you see output like the above you can skip to Connect to the OpenShift Cluster from CLI.
However, if the oc command doesn’t exist or you have an older version of the OpenShift CLI (e.g. < 4.4.x), select the tab appropriate to your OS and follow the instructions to install or update the OpenShift CLI.
If you have HomeBrew installed you can instead install the OpenShift CLI using the brew command. If you don’t have homebrew, then follow the manual download and install instructions that follow the inset.
|
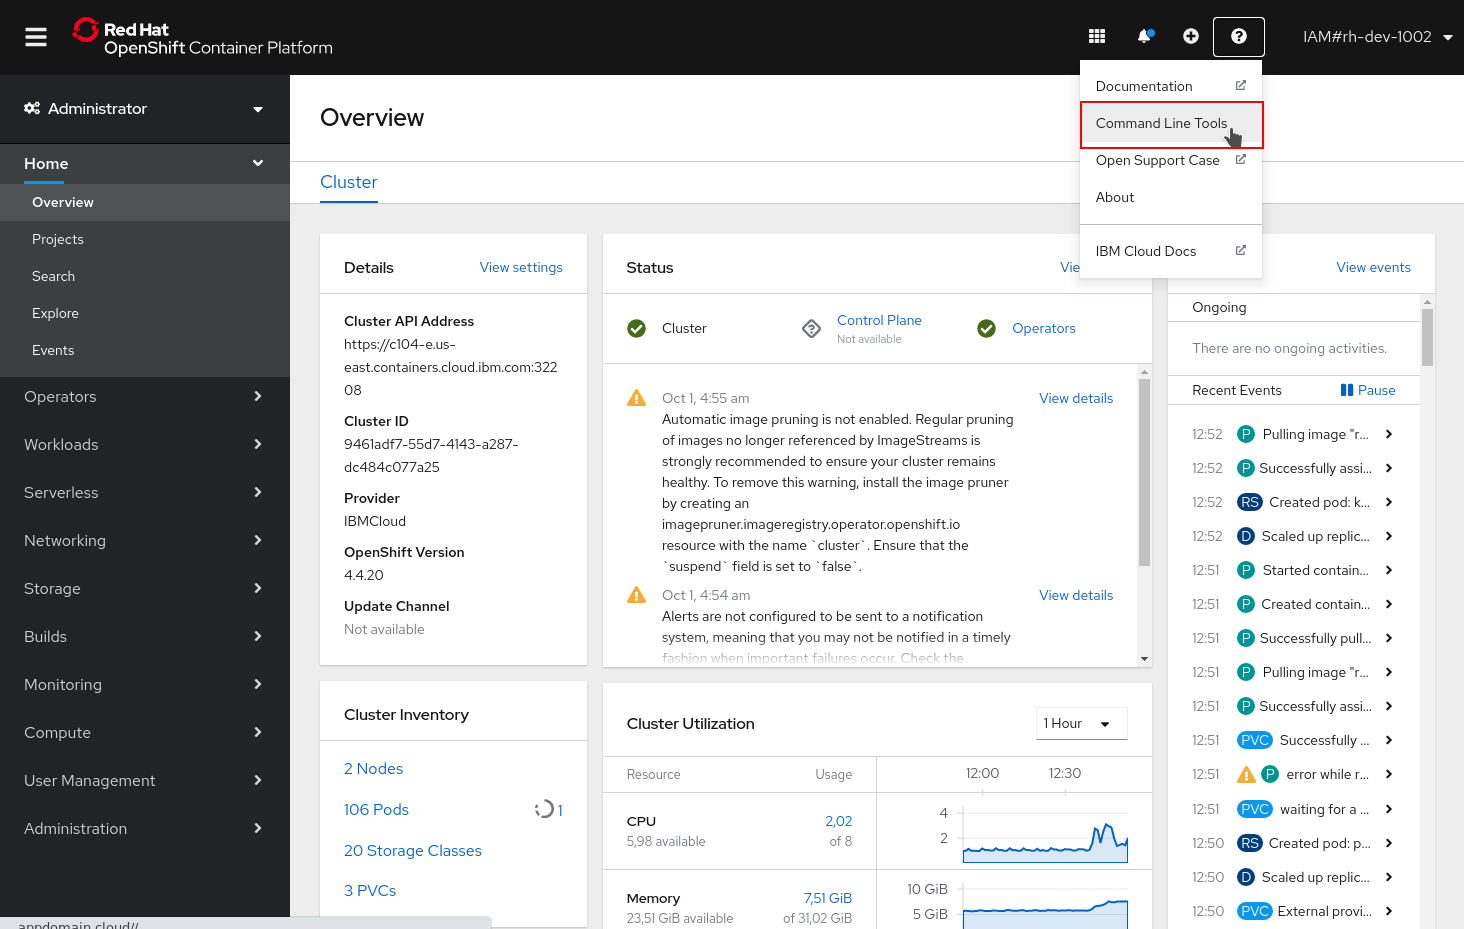
From top right menu bar, click to the little white question mark icon, then click to Command Line Tools:

Scroll down to oc - OpenShift Command Line Interface (CLI) and click on the link appropriate to your OS

Once the file has been downloaded, you will need to extract the contents as it is a compressed archive. It is recommended that this file is saved to the following directory:
~/OpenShiftOpen up a terminal window and change to the directory where you downloaded the file. Once you are in the directory, enter in the following command:
| The name of the oc packaged archive may vary. Adjust accordingly. |
tar zxvf oc-macosx.tar.gzThe tar.gz file name needs to be replaced by the entire name that was downloaded in the previous step.
Now you can add the OpenShift CLI tools to your PATH.
export PATH=$PATH:~/OpenShiftAt this point, we should have the oc tool available for use. Let’s test this
out by printing the version of the oc command:
oc versionYou should see the following (or something similar):
Client Version: 4.7.0If you get an error message, you may not have not updated your path correctly. If after checking your PATH you
still cannot get the oc command to work, contact your lab instructor for assistence.
From top right menu bar, click to the little white question mark icon, then click to Command Line Tools:

Scroll down to oc - OpenShift Command Line Interface (CLI) and click on the link appropriate to your OS

Once the file has been downloaded, you will need to extract the contents as it is a compressed archive. It is recommended that this file is saved to the following directory:
~/OpenShiftOpen up a terminal window and change to the directory where you downloaded the file. Once you are in the directory, enter in the following command:
| The name of the oc packaged archive may vary. Adjust accordingly. |
tar zxvf oc-linux.tar.gzThe tar.gz file name needs to be replaced by the entire name that was downloaded in the previous step.
Now you can add the OpenShift CLI tools to your PATH.
export PATH=$PATH:~/OpenShiftAt this point, we should have the oc tool available for use. Let’s test this
out by printing the version of the oc command:
oc versionYou should see the following (or something similar):
Client Version: 4.7.0If you get an error message, you may not have not updated your path correctly. If after checking your PATH you
still cannot get the oc command to work, contact your lab instructor for assistence.
From top right menu bar, click to the little white question mark icon, then click to Command Line Tools:

Scroll down to oc - OpenShift Command Line Interface (CLI) and click on the link appropriate to your OS

The CLI for Windows is provided as a zip archive. Download and unzip the archive with a ZIP program and move the oc binary to a directory on your PATH. To check your PATH, open the Command Prompt and run:
pathCheckout this blog post if you’d like to set it up with Powershell
At this point, we should have the oc tool available for use. Let’s test this
out by printing the version of the oc command:
oc versionYou should see the following (or something similar):
Client Version: 4.7.0If you get an error message, you may not have not updated your path correctly. If after checking your PATH you
still cannot get the oc command to work, contact your lab instructor for assistence.
Connect to the OpenShift Cluster from CLI
Once your oc client is setup on your Workstation, you can connect to cluster and start working also with OpenShift CLI.
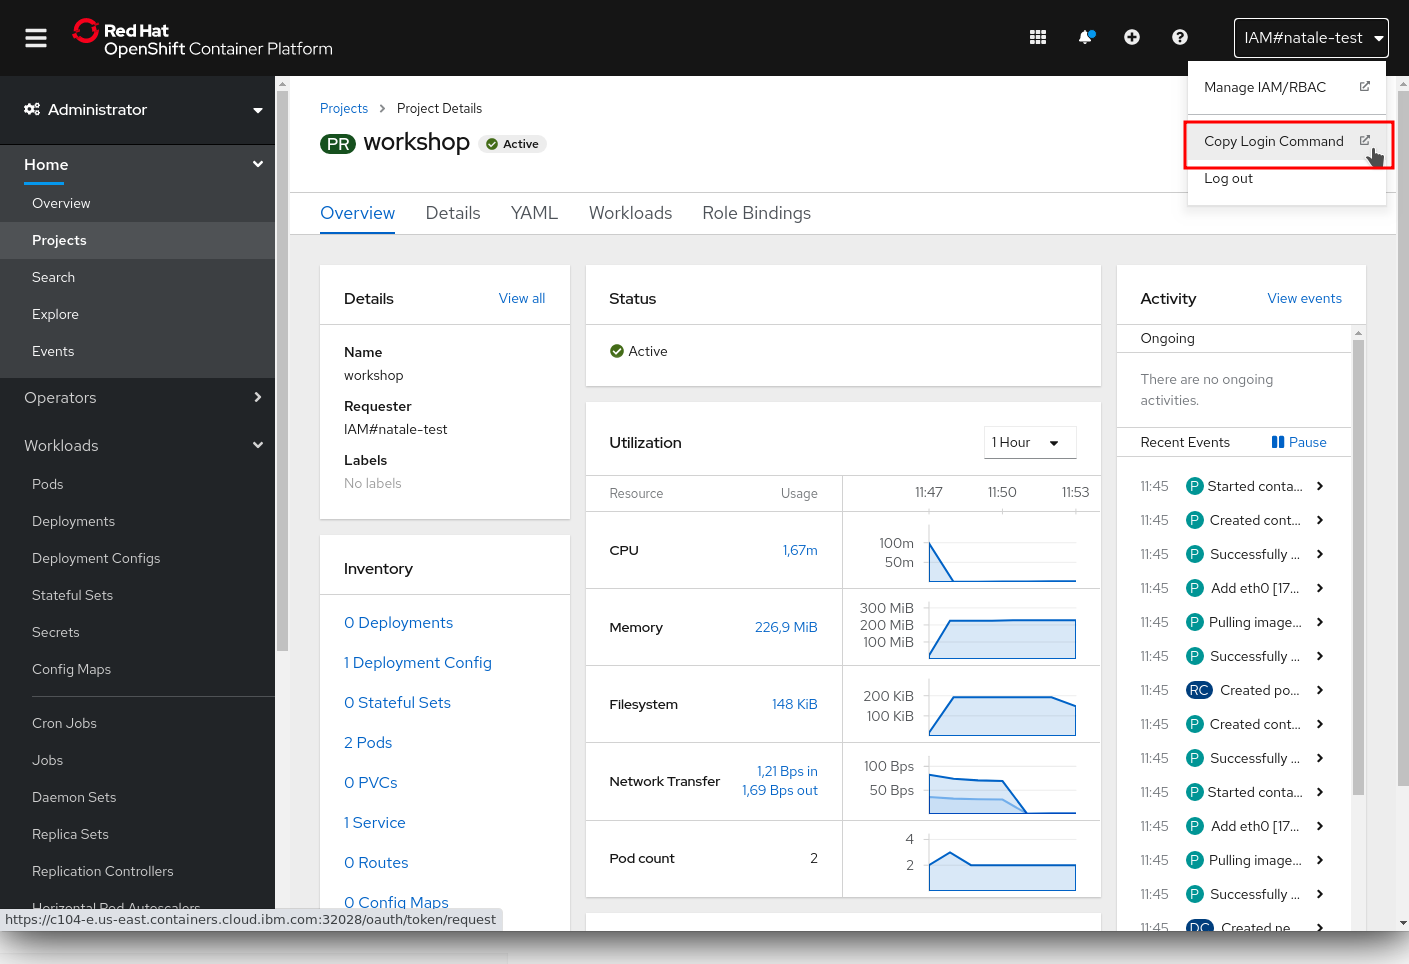
From Web Console overview, go to top-right menu bar and click to the dropdown menu containing your username, then click Copy Login Command:

Click on Display Token and copy the command under Login with this token:
Example:
oc login --token=some_token --server=https://c104-e.us-east.containers.cloud.ibm.com:32208Logged into "https://c104-e.us-east.containers.cloud.ibm.com:32208" as "%USERNAME%" using the token provided.
You have access to 68 projects, the list has been suppressed. You can list all projects with 'oc projects'
Using project "default".Working with proxies
It might happen that you’re behind a corporate proxy to access the internet. In this case, you’ll need to set some additional environment variables for the oc command line to work. Select the tab appropriate to your OS below.
| Replace the proxy server with the one for your environment/machine. |
export https_proxy=http://proxy-server.mycorp.com:3128/
export HTTPS_PROXY=http://proxy-server.mycorp.com:3128/| Replace the proxy server with the one for your environment/machine. |
export https_proxy=http://proxy-server.mycorp.com:3128/
export HTTPS_PROXY=http://proxy-server.mycorp.com:3128/
Follow previous section’s instructions on how to set an Environment Variable on Windows. The variables you’ll need to set are:
| Replace the proxy server with the one for your environment/machine. |
https_proxy=http://proxy-server.mycorp.com:3128/
HTTPS_PROXY=http://proxy-server.mycorp.com:3128/|
If the proxy is secured, make sure to use the following URL pattern, replacing the contents with the appropriate values: export https_proxy=http://USERNAME:PASSOWRD@proxy-server.mycorp.com:3128/ Special Characters: If your password contains special characters, you must replace them with ASCII codes, for example the at sign @ must be replaced by the %40 code, e.g. p@ssword = p%40ssword. |