Quota#
Create#
Overview#
The quota creation process allows administrators to define resource limits and optional configurations for containers and pods. This document outlines the steps to create a new quota, including the metadata, resource quota, and limit range configurations.
Step 1: Metadata#

-
Name Field
- The name field is mandatory and must be unique.
- If the name already exists, an inline error message is displayed.
-
Error Handling
- Regex Validation
- The quota name must conform to the following regex pattern:
/^[a-z0-9]+(-[a-z0-9]+)*$/- This ensures that quota names consist of lowercase alphanumeric characters and hyphens, and do not start or end with a hyphen.
- The metadata section in the drawer while creating a quota is to provide a name for the quota. Users must ensure the quota name meets the specified criteria. Also, the quota name should not already exist in order to create a new quota.
Step 2: Resource Quota#
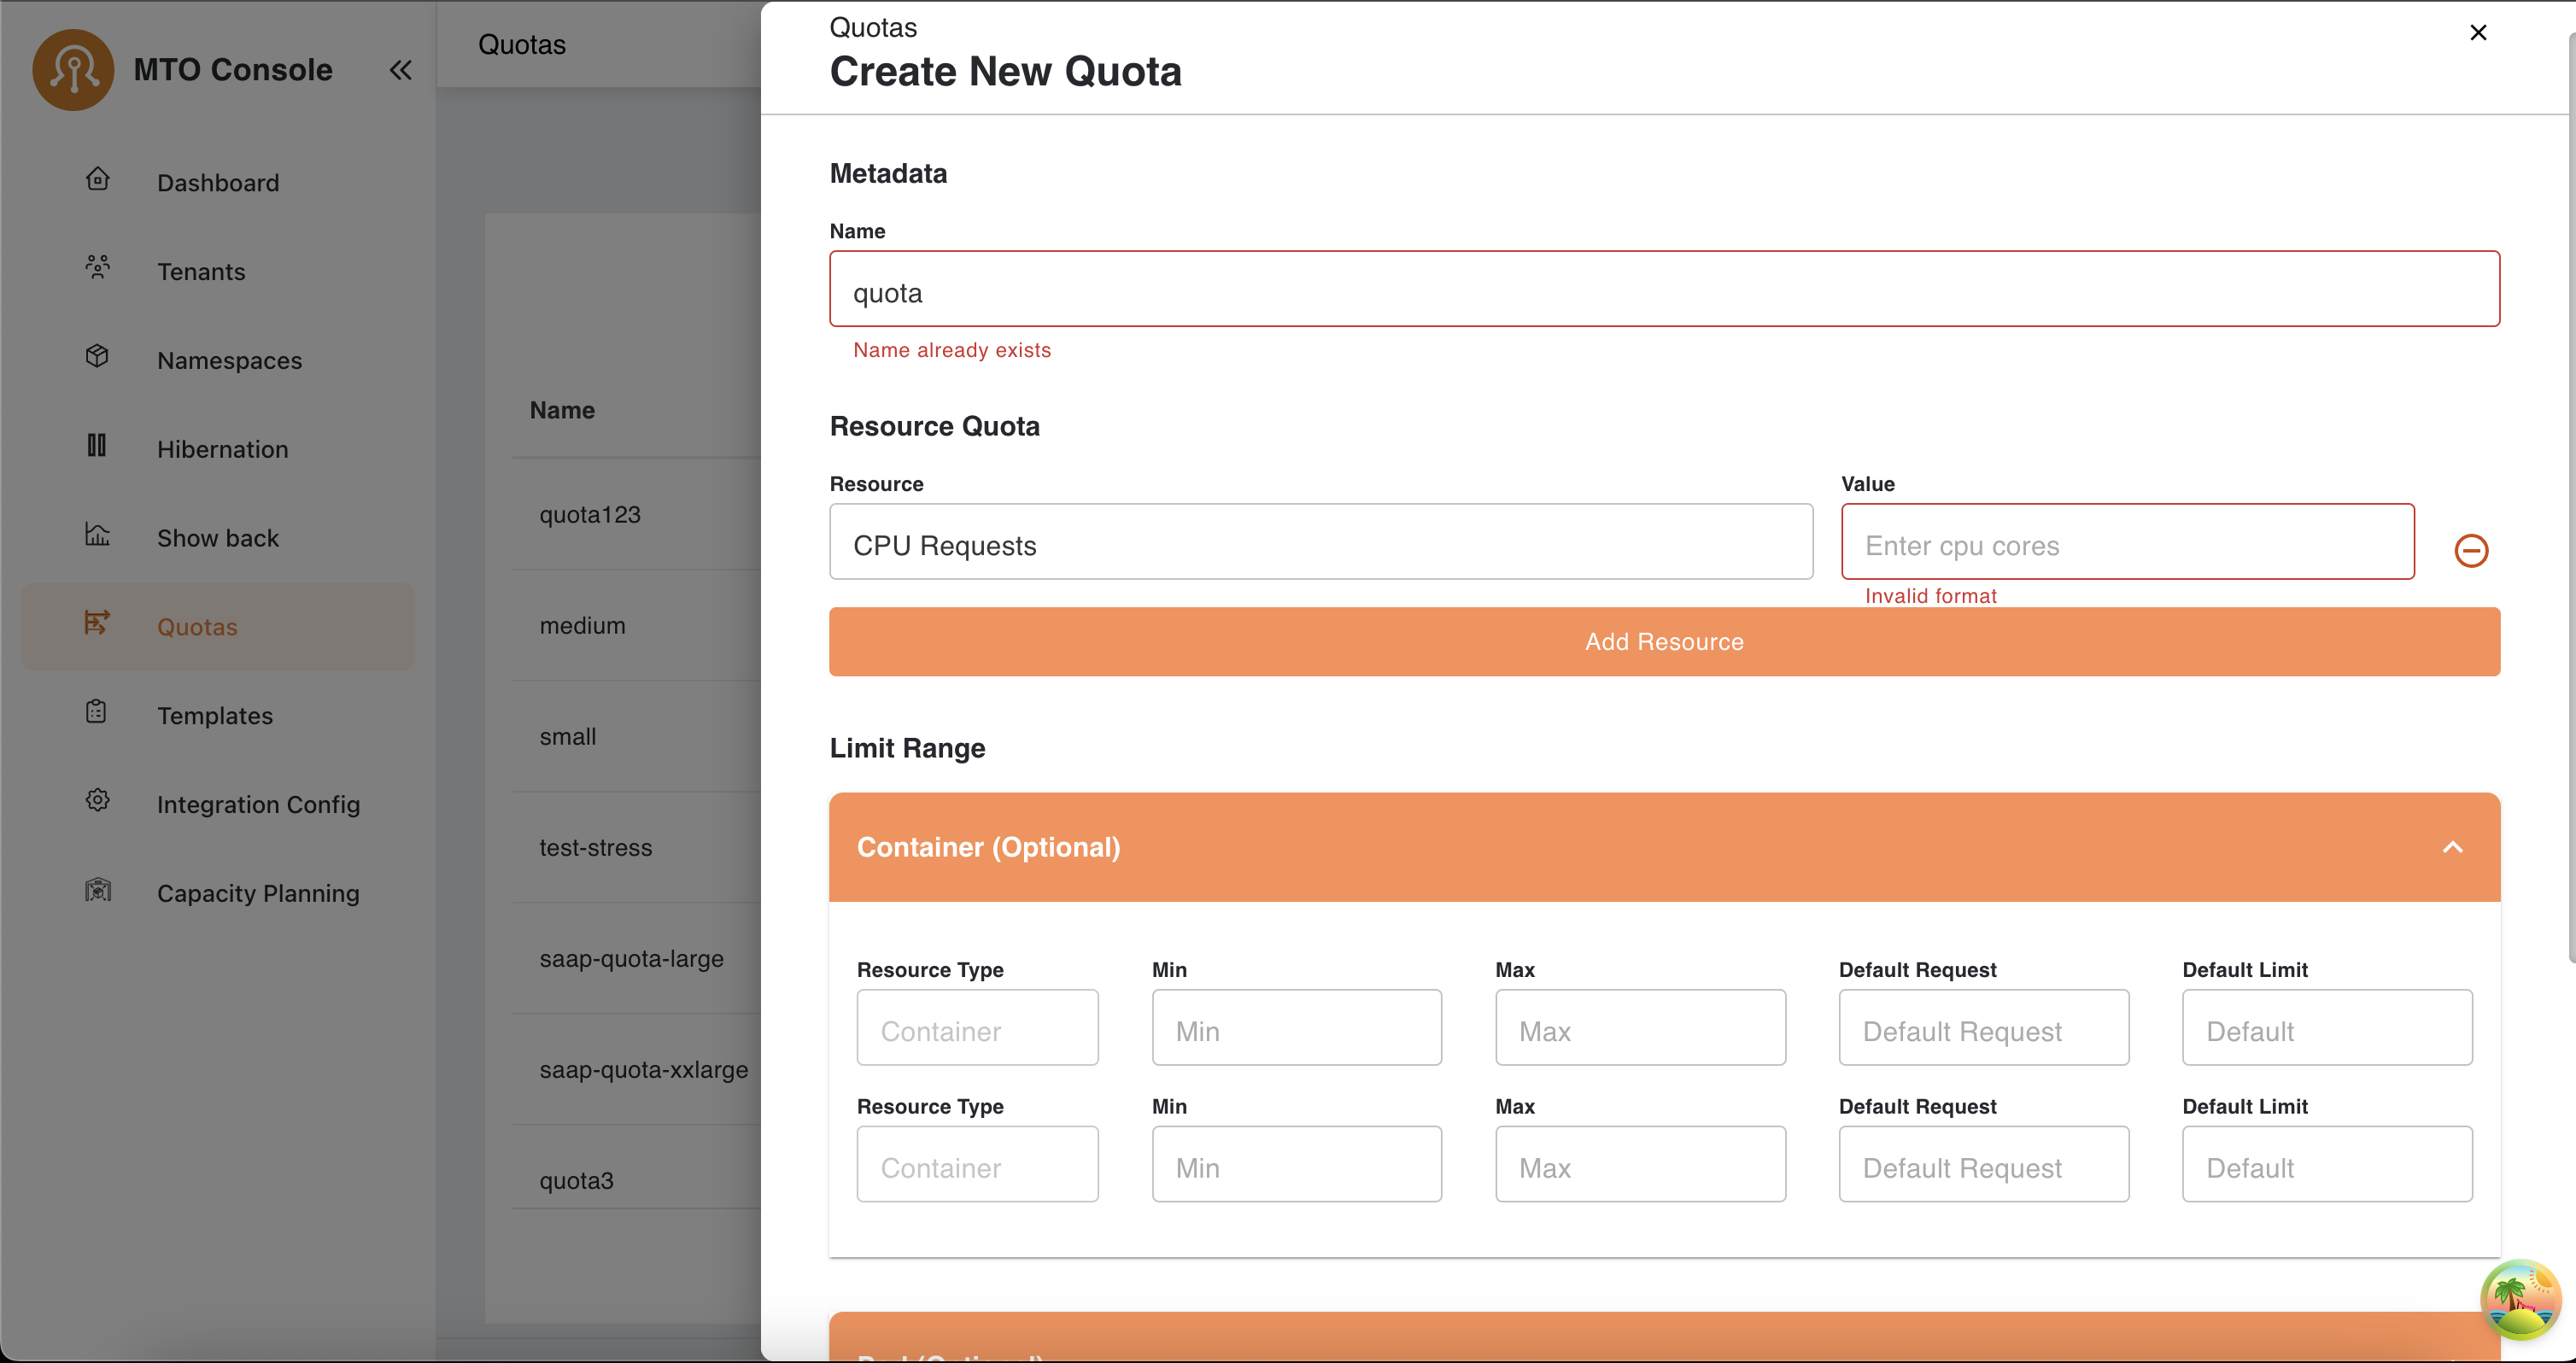
- Adding Resources
- The Resource dropdown allows the selection of resource types such as:
- CPU Requests
- Memory Requests
- Config Maps
- Secrets
- Services
- Load Balancer Services
-
Enter the corresponding Value for the selected resource.
-
Error Handling
-
If an invalid format is entered in the Value field, an inline error message is displayed.
-
Add Resource Button:
- Allows users to add multiple resources sequentially.
Step 3: Limit Range (Optional)#
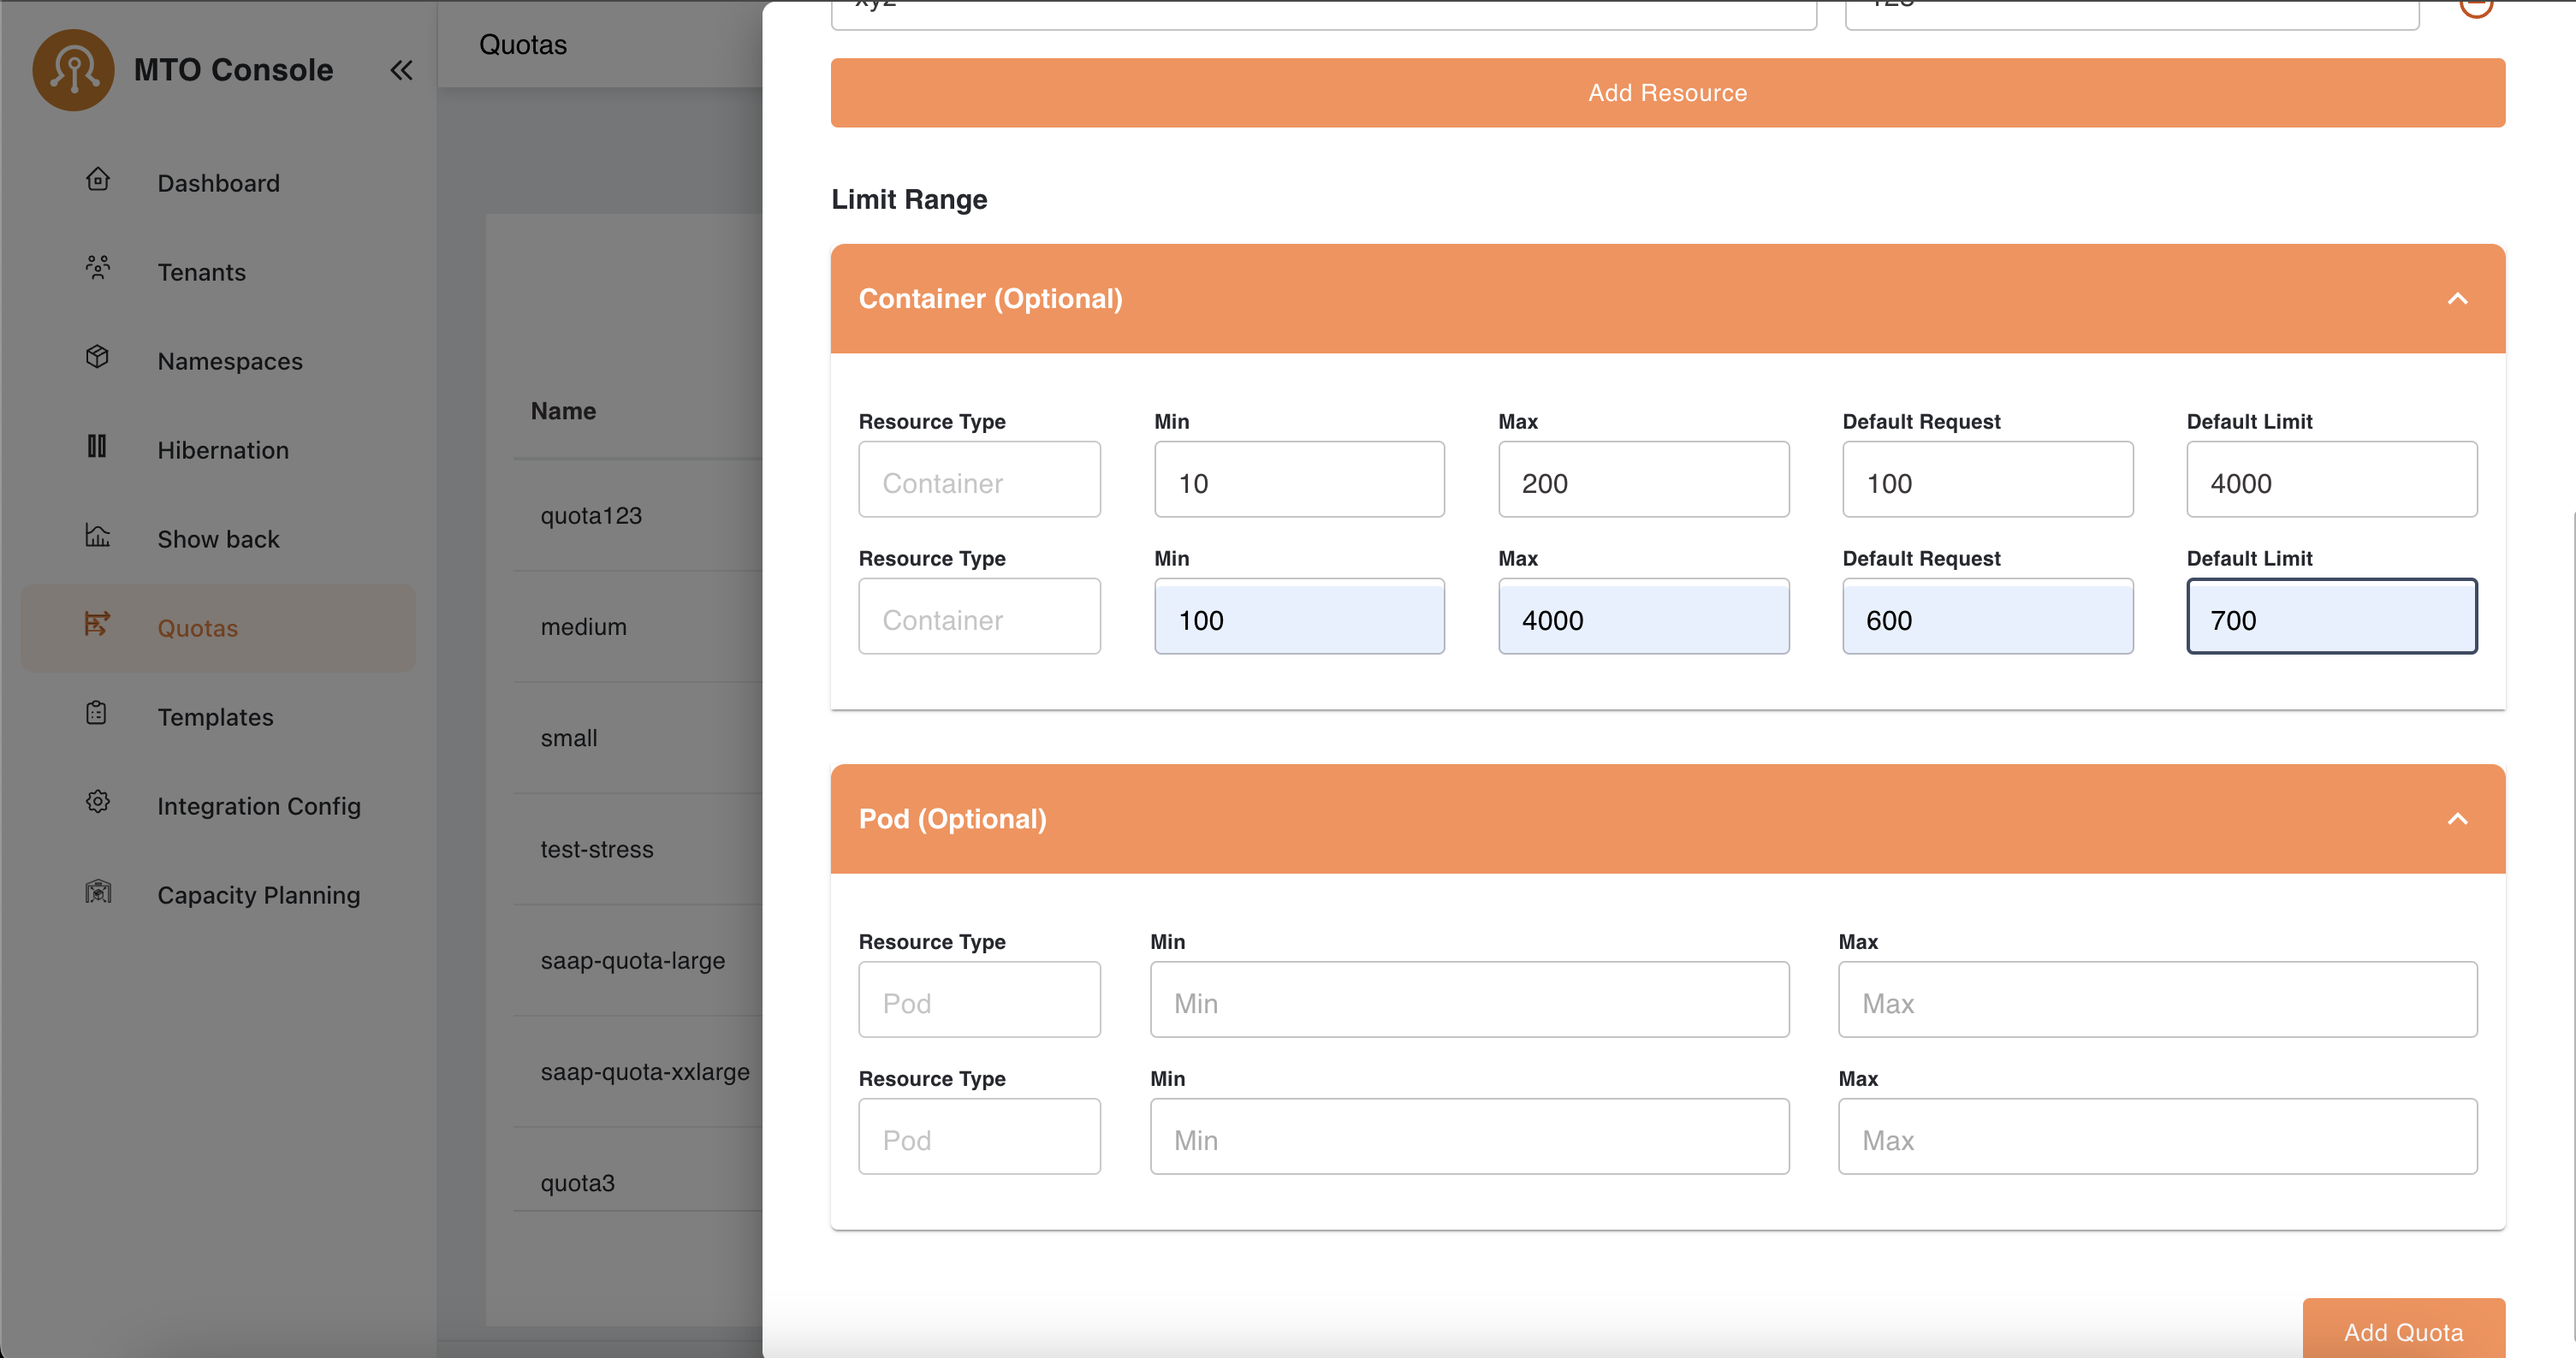
The limit range section provides optional configurations for containers and pods. It includes:
- Container
-
Configure limits for container resources by entering:
- Min and Max values for resource types.
- Default Request and Default Limit values.
-
Pod
-
Similar to the container section, allows configuration for pod-level resources.
-
Error Handling
- No validation errors occur unless an invalid value is entered.
- Inline errors guide users in correcting their inputs.
Final Step: Save Quota#
- Add Quota Button
-
Once all configurations are completed, users can click the Add Quota button to save the quota.
-
Completion
- The system validates all input fields before saving.
- A confirmation message is displayed once the quota is successfully created.
Notes#
- The entire quota creation process is intuitive, with inline validation to guide users.
- Optional configurations like "Limit Range" allow flexibility based on use cases.
Update#
User can click on the edit button in the table under the action items to open the drawer with all the pre-populated quota configurations.
The update process follows a similar flow to the create process. However, the key difference is that the quota name in Step-1 cannot be edited or updated. All other steps and configurations remain the same, allowing users to modify resource quota, limit range values as needed.
Delete#
By clicking on the delete option in the quota table the user will be able to perform delete operation, a confirmation modal will open which will prompt the user to delete or cancel operation.